Monday, October 24, 2016

Battle Report 27, High Reward Steamroller Round 3, Tanith vs. Rasheth

Prologue:

I was surprised and delighted to be in the finals for this event, but the list pairing I had in front of me was making me panic a little. It didn't help that I hadn't eaten anything in nearly 8 hours and was starving.

My opponent had Rasheth with 6 Cyclops Shamans and stuff and Zaal 2 with 3 units of Immortals.

I was pretty darn sure Wurmwood was a terrible matchup here, even though typically he loves to play into Recon, so I dropped Tanith.


I wasn't really surprised when he dropped Rasheth into me.


Dominar Rasheth
-Gladiator
-Raider x2
-Shaman x6

Soulward x2
Willbreaker x2
Void Spirit

Min Beast Handlers


He won the roll and opted for first. Since the only thing Shamans don't ignore from terrain is elevation, I went for the side with the hill that poked into the zone.


I deployed pretty centrally. I had no real solid game plan here. Survive his feat turn and I might be okay? Maybe? If I could jam with enough Griffons I might be able to blunt the shooting somewhat. Keeping Una alive was going to be hard.


Skorne turn 1:

Everything ran. Rasheth got thrown.
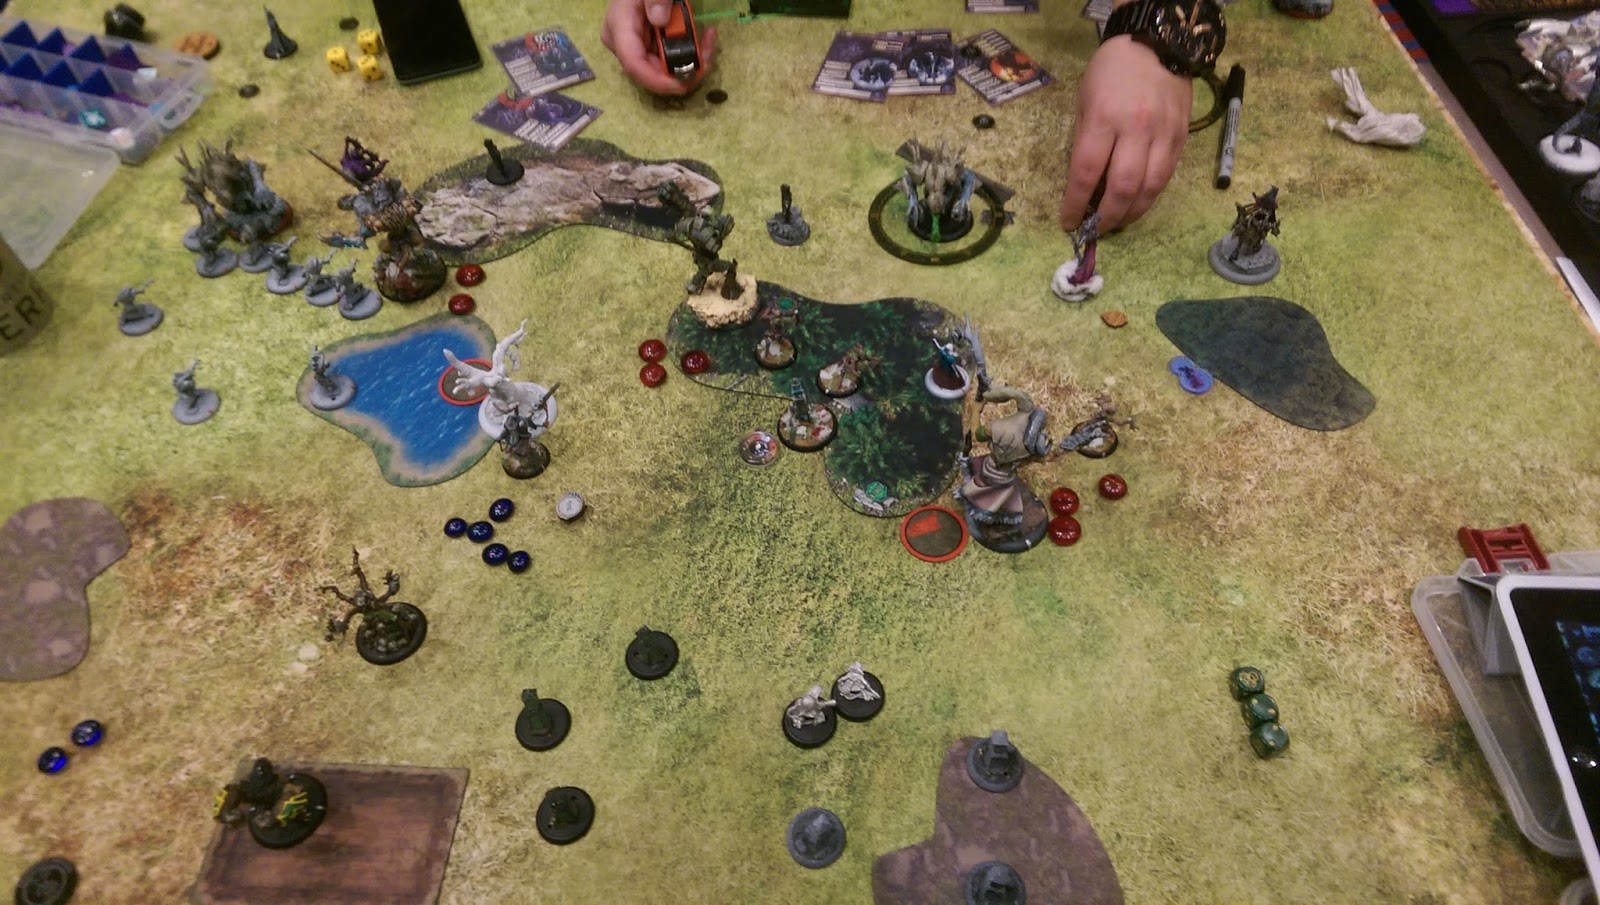


Circle turn 1:

Poor placement and movement made it so that I couldn't get everything I wanted to on the hill.

Stealth all around was going to be interesting though since he could only get four real shots onto things.

Scything Touch went on the Grey Griffon, Admonition on the Pureblood.


Skorne turn 2:

Feat time!

He aimed with basically everything, and both units of Stones died, and the Grey Scarsfell was left with 3 boxes after a couple of shots plus an arced Breath of Corruption through the Void Spirit.


Circle turn 2:

I didn't have distance to the objective (bad play Jaden, bad!) but I could get the yellow Griffon to charge the Raider and/or Shaman on the right, which I did.

I didn't have the resources to mess with the Void Spirit, so I ignored it. things piled onto the hill, the Pureblood warped Spell Ward and sprayed the Objective and Rasheth, doing a few points to each.

I ran the blue Griffon to engage the foremost Shaman on the left.

Snapjaw advanced and riled, Wrong-Eye cast Submerge and Star-Crossed.

Clouds went up from the Gobbers and the central cloud rolled out.


Skorne turn 3:

He shoots more stuff, but with three models engaged and forgetting about Stealth on all the Griffons, he doesn't actually do much but kill the Grey Griffon and charge the Stalker with the Void Spirit, doing ten damage.

He also puts a bunch of hurt into Snapjaw.


Circle turn 3:

I'm shocked to have this much stuff left, and I feel myself rallying. The Pureblood goes in and kills the objective and dinging up the Raider to the right.

Snapjaw charges the Soulward, killing her and healing. He then kills the Shaman and heals as well.

The Blue Griffon charges into the Shaman on the right, killing him.

Wrong Eye advances, casts Submerge and Star-Crossed again.

Everything else chills on the hill, with Tanith toeing the zone for a total of 3 points this turn after casting Scything Touch on the Stalker and camping 4 to prevent getting murdered.


Score 3-1
Advantage Circle

Skorne turn 4:

He uses a lot of time thinking here, before starting things off.

A Shaman charges the Blue Griffon, doing about 2/3 of it's health. I trigger Admonition off of it and the Pureblood backs up.

Shamans and Gladiator get Enraged from the Beast Handlers.

He uses two more Shamans to kill the first Shaman so that his Gladiator can get to my Pureblood.

His remaining attacks go into Snapjaw, who dies.

Rasheth casts Rush and Carnivore onto the Gladiator, who charges in. Star-Crossed means he misses two attacks, leaving the Pureblood on 2.

He passes the turn.

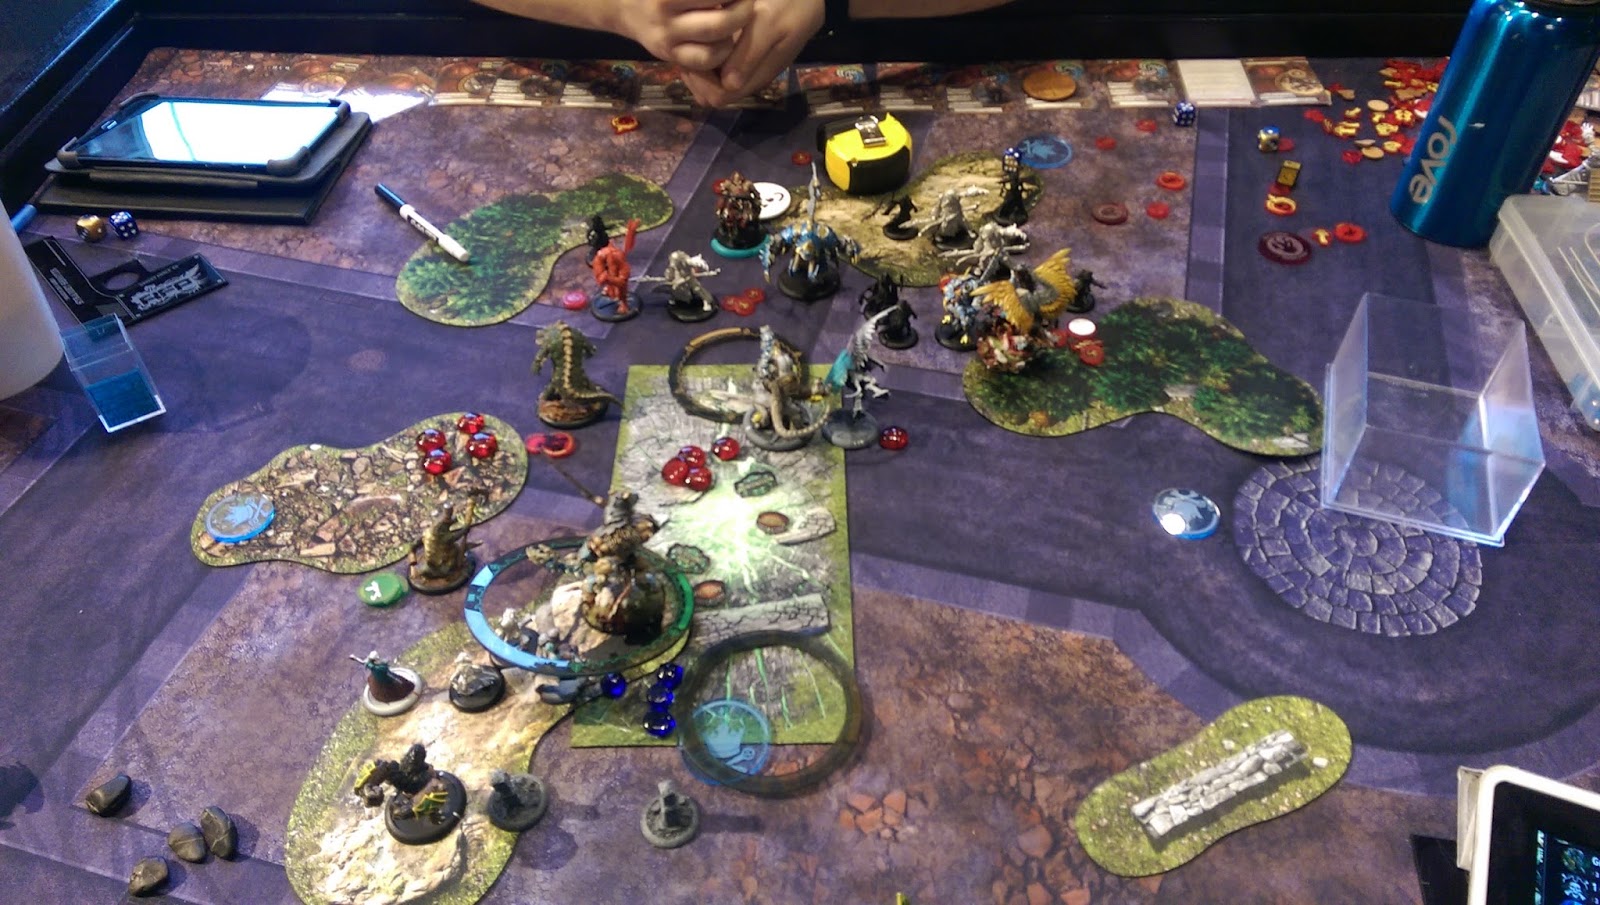
Proxy base is the Gladiator.
Circle turn 4:

I just have to kill a Gladiator and two Shamans.

The Stalker gets Primaled by the Gorax, walks up, and murders both the Gladiator and far Shaman.

Tanith moves up and casts Scything Touch and Primal on the blue Griffon.

This was my first mistake this turn. He had finally not cast Castigate so I should have just feated and used the Pureblood as an arc node to do this.

Una moves up and drops fury.

I actuvate the Blue Griffon....and realize it's Spirit is crippled and Una should have healed it rather than dropping fury.

I don't even ask for the take back, I screwed up and I knew it. The Griffon is MAT 8, effective POW 16/15/15, doing an average of 25 damage if he connects with everything.

He doesn't, leaving the Shaman on 6.

The other Griffon moves over, staying in melee with his other Shaman. His MIND is out, so I boost to hit, and connect. At straight dice, I boost damage and kill the Shaman, getting 2 more control points.


Score 5-0

Victory for the Druids!

Post Game Thoughts:

I had played such a clean and tight event right up until the last 3 activations of the whole thing, and that nearly cost me the game. Now to be fair, I was still very likely to kill the Shaman even with those aspects out, but if they'd been live it wouldn't have even been close. 

ALWAYS check to see if your beasts need healing before sending them in. The irony is that I had made sure the Stalker was okay before I activated him, just forgot about the Griffons. 

This is an interesting matchup to be sure. He gets one turn of shooting before I start to engage his models and he really has to make that count. On the flipside, if he makes it count, I probably lose. It's a very coin flippy matchup, and I'm certainly intrigued by his lists. 

Overall this was a great event at an awesome venue. Anyone who has the chance to visit Mox Boarding House should really do so, you won't regret it!


Battle Report 26, High Reward Steamroller Round 2, Tanith vs. Tanith

Prologue:

As I mentioned in my previous post, there were 2 other Circle players in this event. One of them had lost round one to my Khador buddy, and the other had won round 1 vs. Issyria playing Wurmwood.

We also had the Skorne player winning his first round, so I was slated to get either Khador, Skorne, or Circle.

Out of the three, I really didn't want to play against Khador since 1) he's my good friend and we'd both commuted quite a ways to get to Mox and 2) his lists were the ones I felt I had the worst matchups into.


The stars shined on me and I was dropped into the Circle player who was running a Wurmwood list with 4 heavies and the exact same Tanith list as me!

Unsurprisingly, we both picked Tanith, and we both played:

Tanith
-Warpwolf Stalker
-Pureblood Warpwolf
-Scarsfell
-Gorax

Una
-Scarsfell x2

Wrong Eye
-Snapjaw

Lanyssa

Sentry Stones x2
Shifting Stones
Swamp Gobbers Bellows Crew

He won the roll off and opted to go first on Incursion. I picked the side that would give me the best protection from his heavies thanks to a nicely placed forest and away we went.

He deployed skewed to the right because of the forest, with only Sentry Stone unit 1 and Wrong Eye/Snapjaw over there.


Looking at his deployment, I immediately decided this game was going to be a Scenario game. If he wants to keep contesting that far left flag, he's going to have to sacrifice something to keep contesting.

If that something is Wrong Eye and Snapjaw, then his army doesn't get Star-Crossed and I'll massively win that fight barring goofy dice. If he decides to move them central like he needs to for them to be a big impact on the game, then I get to kill one unit of Sentry Stones and run Lanyssa to control that flag for a few turns.

I deploy very centrally with that in mind.


Bad Guy Tanith Turn 1:

He does exactly what I normally do, Scything Touch on a Griffon and Admonition on the Pureblood.

Una casts Guardian Beast and everything runs up. He tries to bait me with a single Mannikin out of the left unit, but I'm not going to take it.


Good Guy Tanith Turn 1:

Well I do...pretty much the same thing! Except that I get to actually make attacks this turn.

I kill one of my own Mannikins on the right and get a spray into the Scarsfell he has with Scything Touch, cranking the damage a bit and doing 10.

I put my Griffons out of charge range of his Griffons by a sliver, except one which I'm happy to give him if he wants to heal the hurt Griffon and then commit his Scything touch model to somewhere it's not going to do much except maybe kill another Griffon. I'd also put Evasive on the one Griffon he could get to, so if he misses an attack, I get to capitalize.

I DO NOT take the bait, leaving his Mannikin on the left alive, and just generally make a beeline for the hill, staying out of his charge ranges with everything.

His Lanyssa is way off to the side, and I can already feel him shifting his momentum right and abandoning the left flag. He's going to have a hard time contesting meaningfully on the center next turn as well without giving me a really good charge target.

Wrong Eye has Star-Crossed up, but one transfer instead of Submerge. There are enough things around that he can target other stuff with sprays and still get to him.

An important note here - My Tanith stays central after casting Scything Touch on a Griffon and Admonition on the Pureblood, whereas his Tanith is already scooting off to the side.


Bad Guy Tanith Turn 2:

He upkeeps all of his spells and goes to work. Tanith heals the one Griffon and moves over again before it charges in, boosting hits and killing my Yellow Griffon. Darn.

He moves another Griffon up to the flag so that if I don't contest he gets to score.

His Pureblood warps Spell Ward and sprays my unpainted Sentry Stone, leaving it on one.

His Mannikins have a hard time hitting Star-Crossed 10s and kill one Mannikin of mine.


Good Guy Tanith Turn 2:

It's time to score!

I upkeep my spells and start my turn. Tanith moves first, advancing to 10 inches away from his Pureblood and boosting a shot at it, connects, and then whiffs damage and only does 1.

The Gorax moves up and Primals the Grey Scarsfell.

It charges into the Pureblood, who tries to trigger Admonition. I remind him he is Shadow Bound, and the Pureblood goes nowhere. The Griffon kills him handily.

Side note - this list is designed to trade Griffons for heavies, and this is the first time I've ever pulled it off thanks to other attempts getting diced, and it felt pretty awesome to have it work.

The Grey Sentry unit activates, gets more Fury, caps the flag and Sprays the left hand Sentry Stone itself down to 2 boxes. A forest is made for Tanith to hide behind.

The Pureblood moves up and finishes off the Sentry Stone with another Spray.

The Blue Griffon moves up and headbutts the bad Griffon, then buys an attack and does some damage.

Una moves up, shoots him a few times, and then gets ported back with the Shifting Stones.

The Painted Stone unit rolls 3 fury, places a Mannikin contesting the right flag and in the bad Griffons back arc. A forest is made to complete Tanith's wall, and the Mannikin boosts damage on a Spray, killing that Griffon dead.

I can't get anything over to the far left flag, but Lanyssa runs for next turn.

Star-Crossed goes up again with Wrong Eye right in the middle of the table.

I get one point.


Score 1-0
Advantage Good Guy Circle


Bad Guy Tanith turn 3:

The remaining Sentry Unit sprays down the Grey Stone on my side and kills the contesting Mannikin.

The Stalker gets Admonition put on him, and Tanith advances.

The Stalker charges in and murders the Sentry Stone.

He spends the activation of Una, a Griffon, and Snapjaw to kill the Grey Griffon.

The other Griffon charges but fails to kill my Blue Griffon.

Lanyssa caps his flag. Star-Crossed and Submerge go on Wrong Eye, but he's really far away from anything important.

His Shifting Stones go wayyy back, and the leader model is in the middle. I'm still not sure what the intent was here.

He gets one point.


Score 1-1
Tied Game

Good Guy Tanith turn 3:

My central placement of Tanith is about to pay off once more. She upkeeps Admonition and then moves around Wrong Eye to the hill. She shoots the Stalker, boosting hit and damage, and making him Shadow Bound. 

Wrong Eye moves up to cap the flag, casting both Submerge and Star-Crossed. Snapjaw charges in and murders the Stalker. 

Lanyssa runs to the far flag. The Pureblood advances and sprays at the Shifting Stone behind Wrong Eye, boosting hit and damage on him, doing enough to kill! And then he toughs. Darn!

Stalker runs up. 

Between Una and the Blue Griffon getting Primaled, the other Griffon dies. 

I get two more points and contest with the Shifting Stones. 


Score 3-1
Advantage Good Guy Circle

Bad Guy Tanith turn 4:

We measure it out and he can't contest the far flag with anything, but he wants to murder stuff so he charges in and kills Wrong Eye. Stuff runs futilely. 

I get another point.


Score 4-1
Advantage Good Guy Circle

Good Guy Tanith turn 4:

I'm not a fan of rubbing a win in, so I just activate everyone and do nothing, getting a fifth control point and the win. 


Score 5-1

Victory for the (good) Druids!

Post Game Thoughts:

So Tanith is really good, and this game basically came down to where we both placed our Tanith's. My central placement allowed me to get around Admonition and murder his relevant models without any retaliation of note.

The other thing that I did which he did not was place Wrong Eye in such a way that Star-Crossed actually mattered, and it did matter. 

Really interesting matchup, and a very good game. 

Skorne had won against Khador, so I was in for a rough time in the finals...


Battle Report 25, High Reward Steamroller round 1, Wurmwood vs. Haley 2

Prologue:

I was able to attend a High Reward Steamroller at Mox Boarding House in Bellevue this last weekend, a format with an 8 person cap and a $25 buy-in price (which is a lot for an 8 man steamroller).

I took my tried and true pairing of Tanith and Wurmwood:

Tanith
-Warpwolf Stalker
-Pureblood Warpwolf
-Scarsfell Griffon
-Gorax

Una
-Scarsfell Griffon x2

Wrong-Eye
-Snapjaw

Lanyssa

Sentry Stones x2
Shifting Stones
Swamp Gobbers Bellow Crew
Obective: Fuel Cache

This is my Circle, Ret, and situationally Trolls, Mercs, or other dudespam drop. Scarsfell Griffons trade into squishy heavies really, really well, and they're not easy to kill on the backswing without significant investment.

My Wurmwood list is a bit of an oddball, with Brennos and Megalith being a module I haven't seen anywhere else. The idea here is that Brennos plus Megalith can literally shut down a colossal for an entire game. Brennos also has blessed naturally on his staff, and that has come up quite a few times for me now.

Wurmwood
-Cassius
-Warpwolf Stalker
-Brennos
-Megalith
-Gorax

Lanyssa
Gallows Grove

Sentry Stones x2
Shifting Stones x2
Min Bone Grinders
Gatormen Bokur and Shamblers
Swamp Gobbers Bellows Crew
Objective: Fuel Cache

The field was pretty non-diverse, with three Circle players all rocking Wurmwood and Tanith (one of the guys had the exact same Tanith list as I did!), two Ret players with Issyria/Kaelyssa and Rahn/Vyros 1, one Khador player with Butcher 3/Irusk 2, one Cygnar player with Haley 2/Caine 2, and one Skorne player running Rasheth with a billion Shamans/Zaal 2 with a billion immortals.

I was pretty nervous going into this event, I hadn't really stretched my competitive wings for solo events in nearly 4 months, and I was worried that I had lost any edge I once had.


Round one, I was paired with the Cygnar player. His lists were interesting, Caine 2 was running two Stormclads and Haley was running:

Haley 2
-Squire
-Stormclad
-Thunderhead
-Thorn

Journeyman
-Sentinel

Max Stormlances
Black 13th
Objective: Bunker

Ultimately, I had a very strong feeling he would drop Haley 2, and since there was so much Circle for me to drop Tanith into and this was a good chance to test Wurmwood into Haley, I ultimately dropped Wurmwood.

We were playing Extraction, and my opponent won the roll off and opted for first.

One side had a forest right in front of the middle deployment zone, and the other had a forest up and to the right. There was a wall on that side, a hill on the edges of the Scenario, and a cloud in the center with a trench on the far side.

I opted for the side with the more central forest and wall, hoping that the forest in his face would force him to split his army, and it did.

Cygnar Deployment:


I counter-deployed:


The important things here are really just the forest and the wall and the trench. The cloud is going to go away most likely, and the forest here allows me to completely hide Wurmwood from his entire army. I lined up the Stalker across from the Lances since the game plan was to bait them with the Sentry Stones and then kill as many as possible.


Cygnar turn 1:

He's pretty aggressive here.

Arcane Shield goes onto the Stormlances and the Jr. moves up behind the forest. The Black 13th run and spread out to avoid Hellmouth. Thorn and Thunderhead run, the Stormclad gets TKed, and Haley puts up Deceleration, moving almost into the trench. The Sentinel runs.

As you can see, the sun was pretty bright and this would lead to issues for pics.

Circle turn 1:

I go into the tank for a while and then decide that since I'm the one going second, I'd really like to just bubble up and force him to commit. If he does and feats, I counterfeat and get a control point most likely, which is a bad place for him to be.

I place my cloud, and Cassius runs. I try for an unboosted Curse of Shadows on the Stormlances and miss, then I Dark Path Cassius back and cast Wild Growth to continue my wall of LOS denial.

Bone Grinders murder eachother, as usual.

Everything else advances or cross runs to get into better position for next turn. I do like one point of damage to a Stormlance with a Mannikin spray.


Cygnar turn 2:

He thinks about it for a bit, and then measures from Thunderhead to the farthest up Sentry Stone, finding he can get within five of it with a TK. Thunderhead gets two focus, Jr. upkeeps Arcane Shield.

The Centurion moves and shoots the Mannikin blocking the black Stormlance. Thorn shuffles to get LOS to Thunderhead.

Thunderhead gets TKed, and so does the Stormlance at the very top of the above picture.

Haley moves into the trench, no feat.

Thunderhead moves up and murders the painted Sentry Stone.

The Stormlances go in and murder the other Sentry Stone, actually doing a few damage to Brennos with eLeaps.

Black 13th move up and do nothing. The cloud goes away.


Circle turn 2:

I measure it out and I can get Megalith into Thunderhead, and I think I can kill 3 Stormlances. This is critical because the less models Haley gets to Alpha with on her feat turn, the better the game goes for me.

Shamblers get placed and one runs between the three stormlances that I don't expect Brennos to kill.

Cassius runs up.

Brennos charges in anddddd whiffs damage on the second lance, leaving it on one.

Wurmwood casts Curse of Shadows on Thunderhead and Hellmouths the Shambler to yank Stormlances closer together.

The Stalker goes in and kill two Lances, and then Sprints out into some Shifting Stones, who port him to the other side of Wurmwood.

Megalith charges in and kills Thunderhead with a fury to spare, so I throw an unboosted Stranglehold at Thorn, but miss.

The sun made picture taking impossible, so here's this Vassal diagram.
Brennos is the green empty base. 


Cygnar turn 3:

Haley hems and haws. Because I've placed the Stalker so far back and within charge range of where Megalith is, Haley would have to expose herself a lot to Feat and catch him to prevent the countercharge if the Stormclad goes into Megalith.

Side note - when two control casters play, generally whichever one feats first without getting a monstrous attrition or Scenario advantage, they lose.

He loads up the Stormclad and drops Arcane Shield.

Haley casts Temporal Acceleration on the Stormclad and does not feat, camping four in the trench. The Stormclad assaults in and murders Brennos. The Stormlances kill the Bokur (sad!).

His Sentinel shoots Megalith and rolls fire for damage. The Black 13th come in and do some Brutal Shots at Megalith, rolling pretty hot as well and leaving him on half. Thorn runs away.


Circle turn 3:

I'm surprised he didn't feat here, and so I spend a few minutes rethinking my turn. I measure from Megalith to Haley and realize she's less than 15 inches away.

I've got ten fury thanks to Stormlances and the Bokur dying, and I can get my new Shambler leader within 3 of Haley, and one Gobber within 3 of Megalith.

I decide to go for it.

Shambler runs. Gobber runs. Shifting Stones port up in front of his Sentinel so that it can't get dragged with Hellmouth.


Cassius runs.

I arc a Hellmouth through Cassius a the Shambler, hitting, and pulling Haley in. I boost damage on her and roll 6, 5, 4, doing 8 damage even after he cancels out five with a focus.

I arc another Hellmouth at the Gobber, boosting to hit, and drag Megalith 3 inches closer.


Megalith heals a d3, and charges Haley. I opt not to boost the charge attack since she has set defense.

Here was my math:

She's got 7 boxes left (averages say she should have 11 left but hey, dice). I miss my first attack, boost the second needing a nine and hit, doing 5 damage after focus reduction (dice +3 = 10, minus 5 = 5). She's now DEF 13, and Megalith buys two more attacks and kills her.

Instead...I roll the hard 11 on the charge and murder her.

Yay!


Victory for the Druids!

Post Game Thoughts:

I actually had several plays open to me here. and I really like both the play I went with and the other option, which was to use a Hellmouth to drag the Sentinel out of control from the Jr. and away from the objective, Hellmouth a placed Shifting Stone to murder all of the Black 13th, and then Feat. 

Port Wurmwood into the center ish part of the table so the forest covers literally everything, have Megalith blow up the objective from trample plus 3 bought attacks, and then have the Stalker control the flag for a point. Following turn, 

I expect him to feat but get no points if I contest with a bunch of shamblers, and I don't actually know if anything was in range to contest the right hand flag, so I could possibly be at 3 points at the end of his turn. 

I'd just need to Stranglehold both light jacks the following turn, possibly murdering Thorn with the Stalker, and keep Wurmwood safe before eventually killing off all of his models and winning on Scenario. 

Friday, October 21, 2016

Battle Report 24, i5 Team Tournament Round 4: Wurmwood vs. Lylyth 2

For our final round, my opponent's team threw their Legion player to the wolves and I got Lylyth 2 AND I got to choose the table on Take and Hold. His other list was an eTwins list that looked like it had even less game into Wurmwood, so I was not surprised when he dropped.....


Lylyth 2
- Ravagore x2
- Bolt Thrower
- Naga Nightlurker

Max Raptors
Blackfrost Shard

Anyssa (Not Lanyssa)
Shepherd x3
Strider Deathstalker x2

I won the roll off and asked to go second, taking the side where the forest would protect the friendly flag.

His deployment:


After seeing the way he deployed, I immediately made two important decisions.

1) I was giving him nothing but stealth models and stones on the right side of the table for his raptors to shoot at. Everything else in the list could prey on things with Prowl, but the Raptors don't ignore stealth and I needed to capitalize on that.

2) I was going to build me a forest wall to advance behind until I could get my Stalker into his Ravagore. I don't need Primal to kill it, and once it's dead, he has to trade his other Ravagore for it, assuming that the Raptors are dead.

With that in mind, I deployed with Wurmwood and not much else on the right, as well as the Gobbers to give him Stealth.


Anyssa chose....a Sentry Stone unit? as her prey and the game began!

Legion turn 1:

His stuff all ran up. He doesn't have anything to shoot at and he doesn't have any reason not to. Mirage goes on the Raptors, and it's a darn good spell. I forgot about it on a crucial turn later in the game, and I'm lucky it didn't cost me. 


Circle turn 1:

The other reason I had chosen this side was the trench, and man was I going to abuse it. Without aiming, his Ravagores need boosted 13s to hit a Stalker in a trench, and that was the only target I wanted to give him.

I pulled the usual Sentry Stone trick on the right and killed one of his Deathstalkers (yay!).

Then I decided to activate Brennos and see if I could get lucky. I shot Ravaging Winds at the Ravagore and it scattered right onto him.

My turn was suddenly immensely easy.

Cassius ran up. Wurmwood cast Stranglehold and boosted damage, doing a couple points to the middle Ravagore. He also cast Dark Path and Wild Growth to get Cassius safe and complete the forest wall.

The other Sentry unit completed the forest wall for Megalith and co to hide behind.

Bone Grinders murdered eachother, and the Shamblers ran, the Bokur getting into the trench. The Bellows Crew made a nice big cloud for Wurmwood.

Lanyssa ran up between the different sections of the forest, and the Stalker ran into the trench, more than 14 inches from his Ravagores.


Legion turn 2:

My opponent considers feating this turn, but he doesn't have many good targets, and one Ravagore is totally out of commission.

Instead, he moves up and murders my left side Sentry Stone with one Ravagore, moves the other Ravagore behind the forest, and moves Lylyth up so as not to killbox herself.

One Raptor contests and the others get closer. He takes a shot at the Bokur, but misses.


Circle turn 2:

It's definitely feat turn. I can get models into his Ravagore, attacks on the Naga, and then probably Stranglehold the other Ravagore again while still killing the Blackfrost Shard dudes with Stalker and Megalith.

I measure it out and start my turn.

Sentry Stone unit sprays and does....not much, I think they kill the Deathstalker.

Brennos charges the Raptor on the flag and murders him dead.

Megalith charges the right hand Shard member, and then Strangleholds the left Ravagore.

Shamblers charge at the Naga.

The Stalker charges the other Shard member and sits there.

The Shifting Stones port Wurmwood to the flag.

Cassius runs, and Wurmwood Strangleholds the Raptor in the forest to death before popping feat and yanking Cassius back with Dark Path.

Lanyssa moves up and uses Winter Storm, catching the Ravagore and 2 raptors in her command range.

I get one point.


Score 1-0
Advantage Circle

Legion turn 3:

My opponent is in rough shape. He's got two heavy warbeasts he can't touch in charge range of Lylyth and a bunch of models that can't do much this turn. He upkeeps Mirage and his Raptors apparition...meaning one can get to Lanyssa and one can get to Wurmwood. Whoops....

The Raptors fail to hit Lanyssa, and they also don't damage Wurmwood. Phew. 

The Nightlurker munches a Shambler, the Strangled Ravagore does nothing, the other Ravagore backs up, and Lylyth runs to the right, away from my guys. 


Circle turn 3:

Alright, time to worry about dying again with the feat down.

I reeve fury after the stones leach one from Brennos, which means Megalith still has one on him.

The Stalker moves over, murders the Naga, and Sprints up the table to engage the Ravagore.

Shamblers charge the Ravagore for a few.

Brennos moves up, and casts Ravaging Winds at the Ravagore, doing a few damage. He then buys and boosts an attack into the Raptor next to Wurmwood, which kills it.

Cassius runs over to the far flag. Wurmwood Strangleholds 2 Raptors to death and then casts Dark Path to get to the flag.

Megalith moves up and Strangleholds the right hand Ravagore.

I get two more points.


Score 3-0
Advantage Circle

Legion turn 4:

My opponent pops Lylyth's feat, does some damage to Brennos, and then contests with a Shepherd.

The left Ravagore tramples over some dudes.


Score 3-0
Advantage Circle

Circle turn 4:

My opponent requests that Cassius do the honors of killing his contesting Shepherd. 

He does so, and I go to 5 points. 


Victory for the Druids!


Post Game Thoughts:

Well Legion is definitely not something Circle has to fear nearly as much in mark 3 as it was in mark 2; My opponent and I laughed about how easy this would have been for him to win with Mark 2 Lylyth 2 and Eyeless Sight. 

I did get lucky with the turn 1 Brennos scatter, but other than that I felt like I controlled the game very deliberately and very well. Props to my opponent for being a super pleasant guy to play against, even while handling probably the hardest matchup his list had.

After I finished, only two other games had finished, both with game losses for my team. Then our Caine player was able to drop Egregore and our Madrak 2 player ground their Sevy 2 player down and won on clock.

Overall the team won 12 of 20 games, scoring 1 more control point than every other team with our win record, which meant we got Second Place!

We were all pretty thrilled, much pizza and rejoicing was had.

Next year, there will be much, much, much more prep!

Battle Report 23, i5 Team Tournament Round 3, Wurmwood vs. Sturm and Drang

Round 3 arrived, and most of my team had eaten a lot of lunch.

That being said, morale had improved. The other team captain decided to pick the tables rather than most of the matchups, and I felt like I had been able to secure most of my team good games.

The other team captain was my opponent, and he chose the table I had wanted most for myself with a beautifully terrain dense zone on one side for Wurmwood to hang out in.

He was playing:

Sturm and Drang
-War Hog
-War Hog
-Road Hog
-Battle Boar

Brigands with CA x2
Bone Grinders (min)

Maximus
Lanyssa

And I windmill slammed Wurmwood since his other list was Carver and I feel Wurmwood is fine into both.

I won the roll off and elected to go second on Outlast.


His deployment:


My deployment:


I had a really, really clear plan of attack here. Turn 1, I Hellmouth as many Brigands off the table as I can on the right side while getting Wurmwood into the forest to give him stealth on the left. Beasts would go pretty central to outthreat his beasts, and if he feats before I do, I counterfeat and ride it out. I'm pretty confidant I can get 3 points on my second turn unless he commits his beasts to die, and I'm fine with that too.

Minions turn 1:

Brigands run up on either side, Beasts make a wall centrally for Sturm to hide behind. Deceleration goes up, which I'd forgotten about and makes the Hellmouth I have planned less good.


Circle turn 1:

I measure the distance from Cassius to the middle Brigand not in the trench on my right side. It's just under 19 inches, so he goes first and runs up the field.

Wurmwood activates next, Hellmouth's that one and kills 3, knocking down two more due to tough. He then casts Dark Path and gets Cassius safe.

Bone Grinders murder each-other. Sentry Stones get a Mannikin killed from each, and they kill the remaining KD'd Brigands on the right.

Everything else advances up. He's put prey on one unit of Shifting Stones and one unit of Sentry Stones, so I play pretty aggressive with my beasts (although keeping them safe from TK plus charge on his hogs).


Minions turn 2:

As expected, he doesn't want to contest with his beasts, and just puts Brigands in the zones, killing some Mannikins and Shamblers.


Circle turn 2:

Between sprays, Strangleholds, and Hellmouth, I am able to completely clear the left zone, while the Shamblers clear the right zone. Wurmwood hops up behind the house and pops his feat.


Score 3-0 
Advantage Circle

Minions turn 3:

He moves up and feats, contesting the left zone with a Road Hog, but keeping his War Hogs central.


Score 3-0
Advantage Circle


Circle turn 3:

I just need to kill 3 Brigands, and I am able to do so with Shamblers and Sentry Stones.

Cassius runs to the right zone, and Wurmwood casts Dark Path to go over and dominate that zone for 2 more, getting me to 5.

I forgot to take a picture of this turn, sorry :/

Victory for the Druids!


Turns out I'd been very successful in lining up good matches for my teammates too, as we all won our games leaving our overall record at 9-6 and in contention for second place.