Saturday, February 25, 2017

Tactica Time: Sentry Stones

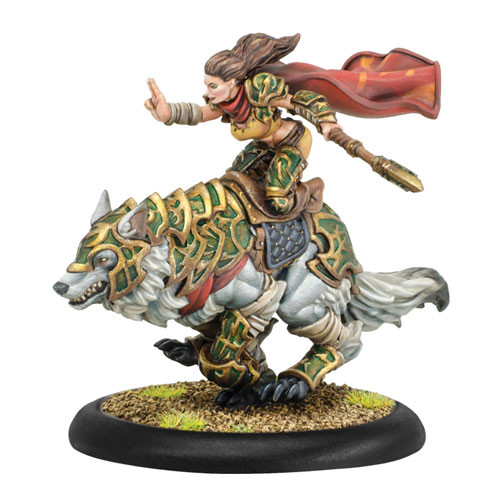
Sometimes I swear that studio painters are Gods - how the crap do you blend wood veins like that?

Prologue:


Ah Sentry Stones, what a rough ride you've had. Originally trash, then brought to prominence by Bradigus' theme force, then elevated to absurdity and now....balanced? 

Hopefully. 

This unit is one of the main reasons that Circle exists as a competitive faction. They allow you to clear infantry, deny LOS, contest zones, kill support models, snipe out solos, finish off battered heavies (charging Mannikins will do some work), and to top it all off, you're very hard to kill. 

Who wants to play Sentry Stones:


Simply put, every warlock in the faction wants Sentry Stones in their list if it's not in theme. They create a mobile bunker of safety for your Warlock. They clear off your heavies from jamming models. They provide excellent targets for things like Hellmouth and auto KD punches from the Woldwrath.

Quick note about those two things:

The Woldwrath can center a 4 inch AOE on any model that it hits (including friendly models). With it's two inch reach, it can extend that AOE to almost 5 inches away from it, catching high DEF enemy models for your other guys to destroy. By putting your Mannikin at exactly 2" from the Woldwrath, you can make massive swathes of guys fall over.

Hellmouth is a spell that Wurmwood has, and it can also trigger its effect (which drags things within 3 inches 3 inches towards the target and puts down a POW 12 AOE 3). I've had opponents spend 10 minutes carefully premeasuring their unit placement so that things were 3.1 inches away from eachother, only to have me run a Mannikin up into the middle of their unit and kill most of it by targeting the Mannikin.

BE AWARE that you CANNOT target friendly models with spells of ANY kind if they are out of formation. Premeasure carefully. 

Their utility is nearly limitless. 

I will go more into general strategies in a few moments, but for now let's go over exactly how their rules work, since this is often misunderstood. 

How to not cheat when playing Sentry Stones:


A couple of very important timing and rules related points:

1) You place a Mannikin during Maintenance Phase if you have less than three of them. This Mannikin can be placed anywhere in command, which is a six inch distance from the edge of the Sentry Stone's base.

Remember, since it's not completely inside command, you can extend out this placement very far.

This allows you to get into models' back arcs or aim or both, leading to essentially RAT 8 sprays.

The horror stories of Sentry Mannikins shredding units usually comes from this kind of placement, as they're not accurate enough to hit high DEF models without boosting otherwise.

2) At the same time, you roll a d3 to add to their fury pool if the Stone has less than three fury on it. This is actually a fantastic time for this to happen.

Since these are simultaneously timed, you can choose the order in which they happen. ALWAYS roll for Fury first. This will let you make a plan for your turn before you place your Mannikin. If you only roll one Fury for example, maybe your guys are charging that turn instead of spraying.

3) You can pay a fury to place a 3 inch forest on the Stone at ANY point during the Sentry Stone's activation. This means that you can have them run, place the forest, and then Weird Growth the Sentry Stone up if you want to leave a nice little concealment patch for a Stalker or other prowl solo.

You can also do it the opposite way, where you run/charge the unit, port the Stone up, and then make the forest.

4) You cannot move the Stone AT ALL except by it's own weird growth. Nothing can slam it, nothing can pull it, nothing can drag it, nothing can place it.

This is an amazing defensive ability since it means your opponent can't TK it closer to them, move it out of the forest, or slam it out of a zone.

It also means that you can't teleport it with Shifting Stones. Make sure to plan out your placement for these guys at the beginning of your turn, since you can't change it once you've committed.


Alright, what are they good for:


I typically think of my Sentry Stones as having one of several different "modes", depending on the game.

1) Infantry Shredders/Jam Removers

Sentry Stones are really good at killing infantry IF they only need to boost the hit OR the damage roll.

If they have to boost both to reliably kill, then they will not be very successful in killing massive amounts of infantry.

Thanks to their ability to place in back arcs and aim, Mannikins are better at spraying down High DEF infantry than they are at killing High ARM infantry.

In the early game, I use the Mannikins to pick off the closest infantry models. Typically I only get about a turn of this before the lines are engaged. The second turn, I place a Mannikin to spray as many of the enemy infantry clogging my lines as possible and use them to unjam my heavies.

2) Solo hunters

Thanks to their ability to boost multiple times, there are no better models for removing annoying solos in the entire faction.

Need Orin gone? Boost boost.

Need Kell to not be alive? Or Alten or Saxon or Pendrake?

Same answer.

If you get to place the Mannikin on your turn, you can hit models that are just over 20 inches away from the nearest edge of the Sentry Stone.

Remember, Sprays ignore cover, concealment, Stealth and LOS (as long as it's not blocked by an obstruction or 3 inches or more of forest), so many defensive abilities are useless against them.

3) Finishers

I cannot count the number of times I've sent a Stalker or Megalith or some other heavy into an opponents Heavy/Warcaster/Objective/random infantry dude and failed to kill it by a point or two of damage.

At MAT 5 and PS 11, the humble Mannikins actually put out a fair amount of damage on the charge or when boosting damage.

Against a DEF 12 ARM 19 target with two boxes left, a charging Mannikin that boosts to hit has a very good chance of taking it down.

Don't be afraid to charge or make melee attacks with these guys, they're very good late game finishing pieces since they can be fairly accurate and do a few points of damage.

4) Contesting/Controlling Scenario Elements

In SR 2016, there are couple of important points about how these guys interact with Scenario pieces.

The first of these is a new addition to the rule set, and we can probably blame the Stormwall and it's pods for this - immobile models cannot control zones or flags.

The second of them is that 50% of a unit must be alive to control a zone or flag.

And an honorary mention that all models in a unit controlling a flag have to be within 4 inches of said flag or inside of said zone.

This means that the Sentry Stone itself cannot control a flag. DO NOT place the Stone base to base with it. You MUST place a Mannikin in contact with the flag in order to control it.

The great thing about Sentry Stones is how easy it is for them to have 50% of their unit alive (one Mannikin plus the Stone is all you need) and within four inches of the flag or inside the zone.

Late game, it's often very hard to kill an ARM 18 model with 8 wounds, and so I've found that sitting the stone in front of the Mannikin and building a forest every turn while the Mannikin camps the flag or zone can be an effective way to get points.

5) Piece Trade Openers

Guys, other people hate Sentry Stones with a passion, and many factions have exactly one effective way of dealing with them - sending in a warjack or warbeast.

Be ready for this to happen, and if possible be ready to counter-attack with your own Warbeasts.

I've traded a Sentry Stone for Ruin, Titan Gladiator, Titan Sentry, Tiberion, Reckoner, Scourge of Heresy, and many, many other models worth 3-4 times its point value.

Don't throw them away, but if you see an opportunity to place the Stone in such a way that it will be impactful and require an opponent to invest a heavy into killing it, do it! Just be ready to kill that heavy afterwards.

6) Mobile Forest Safety Wall

Circle Warlocks can be among the safest in the game and still be fairly close to the fighting thanks to the mobile forest wall these guys provide. You can't kill what you can't target, and with two forests hiding your squishy Warlock, your opponent is going to have a hard time doing that.

7) Fury Management with the Gobber Chef

The quick and dirty - The Gobber Chef gives every friendly warrior model (living, undead, construct) within 3 inches of it Comfort Food, which allows a Warbeast that is a Friendly Faction Warbeast to "eat" the Warrior model to remove any number of fury points during Control Phase.

The Warrior model has to be within one inch of the Warbeast. The Warbeast can be living, undead, or construct and so can the Warrior model. Every single Warrior model within 3 inches of the Gobber Chef gains this ability, so you can use it on multiple Warbeasts at the cost of eating multiple Warriors.

The timing here is the important part - the Mannikins from the Sentry Stone get placed during Maintenance (before Control Phase), which allows you to place the Mannikins next to the Warbeast and in the Gobbers command to clear off Fury. I've used and seen this trick used to stop Frenzies that the opponent is planning on happening. It's always fun when an enemy heavy is parked in charge range of your Feral because they think it's going to frenzy next turn.


Random Stuff that will Come Up:


Mannikins are constructs, which means about half the feats in the game don't work on them (Sevy 2 for example), and they don't generate corpses or souls for your opponents when they die.

They are immune to anatomical precision because it only hits living or undead models.

They don't care about RFP effects because every time you place one it's a "new" model, not a returned model.

They don't allow your opponent to snack on them. They're immune to Fertilizer (super niche Circle keyword for the non-Circle people out there).

Basically just make sure that what your opponent is doing affects all enemy models, not just living or undead ones.

Their sprays are magical weapons, so go ahead and blast incorporeal models and Menoth jacks to your hearts' content.

The forest stays even if the Sentry Stone dies.

Conclusion:


These things are the absolute bomb. Their (terrible) stats will make you wonder on first glance why they're so popular, but boosting, placeable aiming sprays will straight up murder light infantry. The LOS denial they create is immensely powerful.

The skill ceiling on this unit is sky high, so don't be discouraged if they don't do much work for you the first handful of times you play with them. They're the real deal - put in the practice, and they'll become your opponents' least favorite models in the game.

Thanks for reading!

Wednesday, February 22, 2017

Battle Report 67: Kaya 3 vs. Naaresh

Image result for kaya the wildheart art

The American Team Championship is basically right around the corner (eek!), and thanks to the recent Una "balancing", I was scrambling for a replacement second list with just days to think about it before list submission. 

My team really needed another ARM smasher, and so it was that Circle's newest Warlock made her way into my roster. 

Oh boy do I need practice. 

For our game night yesterday, I rolled off to play my Skorne buddy who had Naaresh and Mordikaar with him. I dropped Kaya (Wurmwood seemed like a bad choice) and he dropped Naaresh. 

I won the roll off and slammed going first on Recon. 

Kaya 3
- Loki
- Stalker
- Feral
- Pureblood
- Argus

Blackclad x2
Gobber Chef

Sentry Stone x2
Shifting Stones

Naaresh
- Tiberion
- Despoiler
- Sentry
- Bronzeback
- Gladiator

Tyrant Commander and Standard Bearer
Min Beast Handlers x2


I put my pathfinder heavies on the side of the table with rubble. Loki really threatens the whole table with Shifting Stones, so I also made sure that he was on the same side as they were. 


In post game discussion, my opponent and I both agreed that Tiberion should have been opposite Loki rather than the Sentry. Tiberion can't be dragged, which is a bit of a problem for a wolf with a drag hook. 


Circle turn 1:

He has no shooting, so...time to run? For the first time in a very long time, my Sentry Stones both roll max Fury. 

Stones run aggressively forward. Loki warps Preternatural Reflexes because it sounds cool and runs. The Stalker warps Prowl and runs. 

I get to warp Speed on the Feral and fling him up the table. The Pureblood warps no spells and runs, and the Argus runs. 

Kaya puts up Synergy and charges Tiberion. The left Blackclad runs, the other uses Phase Jump to buddy up with a Shifting Stone. 


Skorne turn 1:

My Feral is nearly threatening his deployment zone, so Naaresh is going to have to Feat Defensively. 

Beasts run up, with the Sentry leading the pack on the right side. Tiberion runs as well, but isn't quite able to get into Shield Guard range of the Sentry thanks to the objective. 

Naaresh gets whipped a few times, then hyper regens the health back. He moves up, puts Blur on a unit of Beast Handlers, Lamentation on himself, and pops his Feat. 


Circle turn 2:

I have an interesting thought that involves Kaya popping her Feat and the Feral trampling through Tiberion and the objective to land next to Naaresh at MAT 12 PS 20, but I don't know how her Feat interacts with tramples and I don't want to take the time to look it up (I need to do that today). Instead, as you can see in the picture above, I think I'm going to yank the Sentry at me and eat it. 

Kaya upkeeps Synergy. I deploy my Gobber Chef, who I had forgotten about somehow.

Firstly, the Mannikins on the right move over and spray the Tyrant Commander to death. 

Loki warps Strength, moves to within 8 of the Sentry, and boosts hit and damage on it, doing an impressive 8 damage and dragging it in. His free attack contributes another 3-4 damage, leaving the Titan on half health and Synergy at 1. He Repositions back between the two left Shifting Stones, staying in the Sentry's melee range. 

The Stones port the Stalker behind the Sentry to ignore the shield, and he finishes him off before paying two for Lightning Strike and moving back outside of the Bronzeback's charge range. 

Synergy is at two. If I could get it to three, I'm thinking pretty seriously about Feating and throwing the Feral at Tiberion with Primal. I can almost certainly get a Hunters Mark on him, and a free charge at dice -2, followed by 5 more dice -2 and one dice -3 averages out to a dead Tiberion by about 4 damage. 

Unfortunately, I can't, so to prevent myself from even thinking about it, I move Mannikins in the way and spray the Standard Bearer down. 

The Feral backs up to 11.1 inches from Tiberion, and the Argus backs up and toes the zone. 

The Pureblood goes on the hill to the left and also stays 11.1 inches from Tiberion. 

Kaya dumps down to two Fury and gets 16.1 inches away from Naaresh, and I pass the turn. I really like my position here. He can apparently get Despoiler onto Loki (I forgot he got errata'd to have a reach weapon), but Oddsmachine says that has a 7% chance of killing him, and he can't get anything else into my army. 


Skorne turn 2:

His objective heals both Despoiler and Tiberion to counteract the Feat. Naaresh upkeeps Lamentation, but drops Blur.

Despoiler gets enraged and has Rush cast on it by the Gladiator. 

He charges in and kills the Sentry Stone and does about 1/3 of Loki's health to him. 

Bronzeback moves into the zone as a counterpunch, and Tiberion moves behind the wall on the left. 

Naaresh stays far, far away from the Feral. 


Circle turn 3:

I leach three Fury with Shifting Stones, and then pull the rest with Kaya, who upkeeps Synergy. 

I start things off with Sentry Mannikins, which was a mistake, and they charge/run to engage both Tiberion and the Gladiator to prevent countercharge. 

I should have cast Hunters Mark at both of them first, but oh well. 

The Argus moves in and Doppler Barks at Despoiler, combo strikes, and boosts damage, doing an impressive 10 damage at dice -2. 

Kaya premeasures to make sure her beasts will all be in control where I want them, heals Loki for a few, and pops her Feat. 

Loki gets ported behind Despoiler, and then warps Strength, dragging him in. He easily finishes the beast with Synergy buffing his melee output, and the Repositions back. 

I spend both Blackclad activations getting Hunters Mark on the Bronzeback, and the Stalker warps Strength, charges in, and kills it. 

The Feral charges Tiberion, rolling 5,5,6 for charge damage, and my opponent concedes as he will be left with one Gladiator facing down four Warpwolves the next turn. 


Victory for the Druids!

Post-Game Thoughts:

This list is a lot of fun, and the threat ranges and damage output are fairly absurd. Synergy plus Loki plus Reposition on everything means that I can usually spend a turn or two thinning out the herd before I really commit with my feat, after which not many things are going to be able to handle 3-4 DEF 16 heavies. 

Loki is absolutely amazing here, giving the list a seriously potent threat extender, who can often hang out 10 inches back from where his target was after yanking it in thanks to Reposition. 

Further testing is required, but Kaya seems very strong too. It's incredibly nice to be able to say that without also adding "and she's probably busted as well" as I had to with my Una 2 batreps. Kaya seems quite balanced and very tricky to play, definitely not an auto win button by any stretch. 

My dice ran a couple points hot this game, with two very sub average rolls the whole game and a couple of very above average rolls. My opponent and I agreed that mostly what that would have changed is the amount of fury sitting on Loki and the Stalker on the last turn though, as the threat ranges and damage output of the list really are just that good. I'm definitely excited to play more with Kaya, she gives Circle the hardest hitting list it can bring, and that's a very cool feeling. 

Thanks for reading!

Sunday, February 19, 2017

Battle Report 66: Anson Durst vs. Reznik 2


I was playing into my ATC teammate who was running his ATC pairing of the exact same Sevy list and a battlegroup heavy Reznik 2 list, specifically geared up for non-Menoth matchups.

We had discussed this before the tournament, and concluded that he had a snowballs chance against Durst, and I was definitely dropping Durst.

This was an extremely lopsided and boring game, so I'm just going to put down the broad strokes.

He played Reznik.

Reznik 2
- Heirophant
- Scourge of Heresy
- Eye of Truth
- Reckoner
- Guardian

Allegiant x2
Wrack
Vassal
Kell Bailoch
Orin Midwinter

Min Choir
Rhoven and Co.

And my Durst list:

Anson Durst
- Heirophant
- Castigator x2
- Templar x2
- Indictor x2
- Devout

Vassal x2
Wrack x2

Min Choir x2

Theme: Creator's Wrath

I won the roll off and opted to go first. The Scenario was Linebreaker.


Druidic Menites turn 1:

Allocate nothing, and run for the hills.


True Menites turn 1:

Also run like crazy. Monks get Shifting Sands Stance.


Druidic Menites turn 2:

Run everything again, pop Feat.


True Menites turn 2:

He comes in on me, nearly killing a Castigator and crit pitching it six inches back at the flag (which was a problem since his Monk was capping it until that point).

Scourge goes in and nearly the other Castigator.


Druidic Menites turn 3:

I flub some serious rolls here, like missing a Guardian three times in a row needing fours, but I still kill Eye of Truth and Scourge, and cripple nearly everything on the Guardian.

I still have all of my heavies on the board, and he's only got one functional jack, and my opponent concedes before my turn ends.


Victory for the Druidic Menites!

Post Game Thoughts:

This game was more or less won at list selection. Durst stomps all over other battlegroup centric builds, and this game showed that quite well. 

I quite enjoyed this little break from Circle, but I'm ready to get back to my Druids. The number of times I nearly forgot to allocate focus was staggering, and I just felt much less comfortable running a Warmachine faction than I hoped I would. 

This game clinched the whole event for me, which was nice, but I don't think I necessarily deserved it this time around. Round 1 I had to open myself up for a 40% assassination in order to dominate the zone, and Round 2 I won purely based on dice. Not the most satisfying way to win, hopefully I'll do better next time :) 

Thanks for reading!

Battle Report 65: February Masters Round 2 - Severius 1 vs. Garryth

"The Pope of Nope"
For round two, I was paired with my PG mentor, the man who really helped me see what running events and fostering community growth was all about. I would have made far more mistakes and done a much worse job without his guidance at the beginning.

He was playing Ret, and as is his custom, one of his lists had two huge based models in them. His pair was Garryth double Hyperion and Thyron with a bunch of weaponmaster ugliness.

I knew I wanted no part with Durst into Thyron, and I felt like Sevy was reasonably okay into both lists, so I dropped Sevy.

My opponent dropped Garryth.

Garryth
- Hyperion
- Hyperion

Arcanist x3
Eiryss 2
Narn
Mage Hunter Assassin x2

I was playing Sevy, and this is the list that Chandler has been refining for months. He recently piloted it to the second day of the LVO masters event.

Severius
- Heirophant
- Blessing of Vengeance
- Hand of Judgment
- Eye of Truth
Avatar of Menoth

Vassal x2
Mechanic x2
Wrack x2
Allegiant x2

Min Choir
Rhoven and Co

We were playing Extraction, and I won the roll, choosing to go first.

Yes, I forgot to deploy the Mechanics, I know.


I wasn't 100% confident that I loved my chances here, but the Fuel Cache cloud coupled with the forest on my objective could keep Sevy relatively safe.

I just needed to wait out his Feat and counter. The Hyperions die to a jack and a half on average, so if I can keep them alive long enough for that to happen, I might be okay?

Druidic Menites turn 1:

Vision goes on the Avatar, Defenders Ward goes onto Eye of Truth, and everything runs.

The fire forest in the middle coupled with the other forest on the right on my opponents side means that I should be able to keep the Avatar from getting charged by a Hyperion. If they trample, Avatar survives no problem.


Retribution turn 1:

My opponent puts Sentry on the right side Hyperion, Mirage on Garryth, and runs at me.

Eiryss moves up and strips Defenders Ward off of Eye (whoops, haven't played against her in so long!), and repositions back.


Druidic Menites turn 2:

Well I kind of have a plan. Avatar is going to pop Gaze and run behind the forest on the right. I'm going to arc Ashes to Ashes at him and blast Eiryss and Narn off the table, leaving just a trampling Hyperion to get to him.

I'll keep Eye of Truth and Hand back, using Hand to spray Eiryss and hopefully kill her.

Seems okay.

Avatar pops Gaze and runs.

I move up Blessing and chuck Ashes to Ashes at the Avatar, and only roll one bounce. That bounce, at dice +1, doesn't kill the MHA.

I throw another one at the Avatar, and kill the MHA, but only do a couple to Narn. Uh oh.

Hand moves up and misses Eiryss, and then I'm an idiot and move Eye of Truth into charge range of the left Hyperion. *Facepalm*

Yeah so many mistakes.

I move both Monks up and use Shifting Sands Stance.


Ret turn 2:

My opponent upkeeps his spells, and his Sentry shot scatters onto both Monks perfectly, forcing tough rolls on both. One of them makes it, and the other dies.

Both Hyperions get loaded up.

The MHA on the left charges Eye and I ignore the attack with Oracular.

He moves Eiryss up and kills his own MHA, and then repositions back so that Hyperion can charge in.

Arcanists make the Hyperions hit even harder, and the left one charges in and slaughters Eye.

Narn charges Avatar and does about 8 damage. The other Hyperion tramples up and buys an attack, which I use Vision to avoid. His second attack does 12 damage.

My opponent moves Garryth up, barely catching the Avatar and pops his Feat.


Druidic Menites turn 3:

I'm in so much trouble.

There's only one bright spot, and that's that I can catch Garryth in my feat, reducing his control area to 8 inches and making it okay for the Avatar and Hand to use Focus.

Avatar rolls a 1 for Focus. Typical.

I allocate 1 to Hand, and then charge the left Hyperion with Rhovens buddies. Dice start to go off the rails, and I end up doing about 15 damage with them.

The Monk also charges the Hyperion, doing another 3 or four.

Heirophant sings Harmonious Exaltation.

Sevy moves around the cloud to the little niche between it and the forest. He pops his Feat, and then starts throwing Immolations at Hyperion. Since Hand is right there, these are POW 15 spells, and I do a fair amount more.

Choir sings Battle on Avatar and Hand, but can't get Blessing.

Hand moves up and takes down the battered Colossal with a focus to spare.

Avatar gets a free focus from the Vassal, and then nearly kills his Hyperion (dice +3 is okay I guess), and Blessing moves in and does some more damage, leaving it on 8 boxes. If I'd been able to Battle up Blessing, or if the Avatar had rolled one more focus, the Hyperion would have gone down.

I end my turn, somehow in a good position despite my disastrous placement from the turn before. Sometimes the dice gods love you.


Ret turn 3:

Garryth drops Sentry, but upkeeps Mirage and moves closer. He allocates one to the Hyperion.

Mega Mittens kills off the Punch Monk and a Rhoven bodyguard.

Hyperion gets healed, powered, and damage amplified, and murders Avatar dead.

Garryth runs and engages Sevy. Uh oh!


Druidic Menites turn 4:
Well..Garryth is camping two and he needs to die.

Hand gets Battled and also gets a free focus from the Vassal. He moves over and sprays the objective. I need an 11 to hit Garryth, and I nail it, doing 5 damage through a focus.

Sevy gets Harmonious from the Heirophant, pulls a focus from the Wrack, and is able to put enough Immolations into Garryth to kill him on the last one.


Victory for the Druidic Menites!

Post Game Thoughts:

Dice. That's the only reason I won this game. I positioned poorly and paid for it, and only the ridiculousness of Eye of Menoth added to some very good dice allowed me to claw this one out. 

It took me a good 20 minutes to relax down from this game, it was a real nail biter. 

On to round three.....

Battle Report 64: February Masters Round 1: Anson Durst vs. Caine 2


In gearing up for the ATC in two weeks, I've built my Circle pairing running Loki in both lists. This unfortunately means that I'm not allowed to play him in events until next Wednesday, and my buddy Chandler needed someone to test out his Menoth pairing for him. 

I had nothing better to play, so I decided to help him out. 

Don't worry guys, I'm still a Druid at heart. 


Going into the event, these were my lists:

Anson Durst, ROCK OF FAITH (love that name)
- Heirophant (free! Theme!)
- Castigator x2
- Templar x2
- Indictor x2

Vassal x2 (free! Theme!)
Wrack x2
Min Choir x2

Bunker

Theme: Creator's Wrath

And then Chandler's Sevy list:

Sevy 1
- Heirophant
- Blessing of Vengeance
- Hand of Judgment
- Eye of Truth

Avatar of Menoth
Vassal x2
Vassal Mechanik x2
Wrack x2

Min Choir
Rhoven and Co. 


Round one I got paired into a Cygnar player running Caine 2 and Haley 2. This is a no brainer drop - Durst has to be the one I play here. Caine kills Sevy far, far too easily. 

My opponent drops:

Caine 2
- Reinholdt
- Stormclad
- Lancer

Jr. 
- Firefly
Arlan
Eiryss 1
Gun Mage Captain Adept

Stormlances
Tempest Blazers

We were playing Recon, and Durst absolutely loves this Scenario. I get to just run Jacks up the middle and dare my opponent to come at me. 

I won the roll off and windmill slammed going first. The Theme giving me Bulwark for free at the beginning of the game is so great since it allows me to put out three Boundless Charges on the first turn and increase the speed/move range of my speed four heavies by 1. 


Druidic Menites turn 1:

Well the plan is to run at him and...run at him and...run at him some more. 

Durst gets Harmonious Exaltation from the Heirophant, who then repositions up. 

Three Boundless Charges are cast, and Durst himself charges up. 

Everything else runs. 


Cygnar turn 1:

My opponent runs things at me, staying outside of my 11 inch threat ranges. Little does he know that I've no intention at all of charging him next turn. 

Fire for Effect goes onto the Gun Mage Captain Adept, and Caine and his battlegroup move up. 

Arcane Shield goes onto the Storm Lances. 


Druidic Menites turn 2:

I have basically the same plan for this turn, except swapping out Deceleration for Boundless Charge

Everything runs. Heirophant casts Harmonious Exaltation and repositions into a jack. 

Durst pulls from a Wrack and casts Deceleration, pops his feat, and then charges a Blazer to end base to base with a jack. 

His Devout runs up behind him, and so do all the choir members to hug their jacks. 


Cygnar turn 2:

My opponent is facing down a horde of angry looking warjacks, and goes into the tank hard. 

He begins by shooting my front right jacks with eLeap shots, eventually killing a couple of choir members. 

His Lancer charges my Castigator, and at dice off 10 does 7 damage to the four, leaving him on one cortex box. He then baps him with the shield and kills the last cortex box. Sighhhh

The Gun Mage Captain Adept aims and shoots at the Templar in front of Durst with Shadow Fire and Brutal damage. 

I shield guard the shot to the Devout, and he rolls absurd damage again, doing 8 to my poor jack. 

Lances back up, away from the jacks. Eiryss moves up and shoots the Templar in front of Durst again, making it Shadow Fired. 

Caine gets reloaded, and goes for the feat, only to find that Durst is able to suck shots off to his battlegroup (this was his first time against Durst). 

After doing one damage to the Templar, Caine casts Gatecrasher and gets behind the cloud. 

The Firefly moves up and zaps down the choir dude by the objective, bouncing into the objective, the Heirophant, and the Vassal. He kills the choir boy and the Heirophant sadly. 


Druidic Menites turn 3:

I've just got to kill the Objective and the Firefly to dominate the zone. 

It takes every attack I have. I just cannot hit the DEF 13 Firefly with anything, and the Devout has to go in and finish it off after I've committed multiple heavies to it. 

Durst sits in the back with a bunch of focus. 

The Castigator on the left moves up and combusts on Eiryss, killing her. 

I get three points. 


Score 3-0
Advantage Druidic Menites

Cygnar turn 3:

My opponent has very few options here, and I'm desperately hoping he doesn't go for the assassination run. 

I really needed to not have to commit the Devout to killing the Firefly, and then everything would be fine. Instead, I feel extremely vulnerable to my opponent doing something like this:

GMCA aims and Flares/Brutal Damage shots Durst for an average of six (1 after focus soak) thanks for fire for effect. 

Each Tempest blazer that's not engaged shoots him for another 3 each on average.

Caine, with Reload, moves around and gets Durst in his sights, firing four fully boosted POW 12s, each doing 5 damage on average. 

Durst can soak 20 damage with focus and has 19 boxes, and my opponent does 28 damage on average here, and the way my opponents dice have been going, he's likely to do a lot more. 

Oddsmachine puts this in the 40% ish range of likelihood, which to be honest, is much better than any of his other options, even if it's not as likely to work as it is to fail. 

Fortunately, my opponent loads up his Stormclad and upkeeps Fire for Effect, and I breathe an internal sigh of relief. 

The GMCA still aims and Flare/Brutal damage shots at Durst, doing five which I power field. 

The Stormclad goes in and nearly wrecks the front Templar, leaving just the cortex and flail intact. 

The Blazers do shoot at Durst, but he takes minimal damage. At this point, I think I would have lived through Caine going at me, even if he hadn't loaded the Stormclad. Durst still had 16 hit points and three focus left, and Caine was only going to be able to do approximately half that much damage.

Stormlances charge the Castigator and the Indictor, wrecking the Castigator with some excellent damage rolls (dice -4 on three dice three times should only be 21 damage, not 32). 

The Lancer pokes at the other Templar's cortex. 


Druidic Menites turn 4:

It's go time, so I allocate a bunch of focus. 

Durst charges and wrecks the Lancer.

The Stormclad goes down between the two Templars, and it takes one Indictor to kill off the Stormlances under battle. 

I dominate the zone again, getting two more control points and the win.


Score 5-0
Victory for the Druidic Menites!

Post-Game Thoughts:

I got both extraordinarily unlucky and extraordinarily lucky here. I should have had ample resources to kill the Firefly sitting in the zone before the Devout went in, which would have meant I had very, very low chances of dying to shooting in this situation. 

Instead, I had to leave Durst sitting out naked against a bunch of accurate, boosted POW 10's and 12's. 

Other than that, the list did exactly what it was supposed to do. I ran up the table and pushed my opponent out of the important areas with a wall of nearly unkillable warjacks. 

On to game two!

Thursday, February 9, 2017

Battle Report 63: Las Vegas Open Invitational Round 3 - Wurmwood vs. Baldur 2

Prologue:

Going into the Semi-Finals, there were three Circle players and a Convergence player. I really didn't feel great into any of the lists (or the players, the shark tank at LVO is real!), and looking back at it, I hadn't eaten or had anything to drink in about 8 hours at this point. 

Pro tip - stay hydrated and eat snacks at big events, it's important. 

Ready or not, I was paired with Tom Guan in the Semi-finals. He had a Wurmwood list that was similar to mine and a REALLY cool Baldur 2 list with the Storm Raptor on Una 1. 

He dropped Baldur, I dropped Wurmwood. 


Baldur 2:
- Megalith 
- Pureblood

Una 1
- Stormraptor
Ogrun Bokur x2 (clients to Sentry Stones)
Gobber Chef

Sentry Stone x2
Shifting Stones
Swamp Gobbers Bellow Crew

vs. 

Wurmwood
- Cassius
- Megalith
- Pureblood
- Woldwyrd x3

Gallows Grove
Blackclad Wayfarer

Sentry Stone x2
Shifting Stone x2
Min Bone Grinders
Gatormen Bokur


I won the roll off and chose second, taking the side with the big forest. 

Also I forgot that Una 1 gives her battlegroup Birds Eye - I haven't played her with anything but Scarsfells in so long that I just remember they have tracker. 


Baldur turn 1:

He runs at me turn 1. No spells up, nothing. Una snuggles into the Storm Raptor and stays in the trio of Shifting Stones.

Megalith tramples at the very end and puts Roots of the Earth on the Storm Raptor.


Wurmwood turn 1:

This turn kind of signals how the rest of the game is going to go, and it all starts so innocently.

The Bone Grinders craft Wurmwood a talisman and then try and ritualistically murder eachother like they do every game, but I miss two attack rolls.

Awkward.

I have a Woldwyrd shoot two of them, but miss once and then the second one toughs.

Basically I can't get to three souls on the tree to save my ilfe.

I port Wurmwood to exactly 12 inches from the Storm Raptor, and Tom kindly reminds me about Birds Eye, so I try, and fail, to Stranglehold the Raptor before camping four.

Megalith tramples up and also tries to Stranglehold the Raptor, but fails.

I brace for impact. Tom likes to go for assassinations I've been told, and Wurmwood is within charge range.

Unfortunately I really don't have a choice here. He's up a gargantuan to my three lights, and I need to bait it out in order to have a chance.

I flood the zone and pass the clock.


Baldur turn 2:

Tom's Sentry Mannikins go nuts and blow up everything the Storm Raptor needed dead.

Una gets ported up, casts Dog Pile at Wurmwood and misses somehow, and then casts it again and hits.

The Storm Raptor charges in but fails to kill Wurmwood. Phew.

Everything else he has toes the zone and he passes the turn. Una is camping nothing.


Wurmwood turn 2:

I place a Mannikin in melee with Una, and another in the zone.

Wurmwood gets nine fury.

Una dies to the first Mannikin attack, and I breath a sigh of relief. I was still playing in my head with Mark 2 wild beast rules, which meant that I thought the Raptor was stuck where he was. (Spoilers, I was wrong).

Lanyssa casts Hunters Mark at the Bokur in front of bad Megalith (she couldn't reach Megalith with it).

Wurmwood gets Curse of Shadows onto bad Megalith, and yanks Cassius back.

My Megalith charges and kills bad Megalith, but for some reason I don't buy my last attack on the knocked down Bokur.

One of my Woldwyrds kills his Central Sentry Stone, and I push into the zone with Shamblers.

I score 1 point, and Baldur does not thanks to a contesting Mannikin.

Score 1-0
Advantage Wurmwood

Baldur turn 3:

Tom spends a few minutes reading the Wild rules, and then has me look at them to confirm we both get it. Turns out, you can literally run a Wild warbeast anywhere now. Uh oh.

He clears a landing spot for the Storm Raptor.

His Pureblood warps Strength and kills Megalith (remember, I had to transfer to him).

The Raptor runs, taking one pretty good free strike. Baldur walks up and spends a fury to restart the engine, and I'm suddenly in big trouble again. Baldur Feats, and casts a Rock Wall as well.

I score again.

Score 2-0
Advantage Wurmwood

Wurmwood turn 3:

This is the turn where things started to go really wrong.

I get Curse of Shadows on the Storm Raptor and put Wraithbane on one Woldwyrd and the Pureblood.

And then I don't Feat because I want the Bokur to charge the Pureblood.

What I SHOULD have done is simply put Wraithbane on both Wyrds and Strangleheld the Storm Raptor before popping feat.

This would have let me shoot the Raptor down to about half health, protected Cassius, and let me get another point, all the while making his entire list basically useless.

Instead, I get greedy and charge the Storm Raptor.

I miss my charge and one bought attack, and my Woldwyrds whiff for damage rolls, leaving the thing on 17 boxes.

I jam the Pureblood with the Bokur (again, he should have been hanging out in the back of the zone under Wurmwoods feat here).

I get another point.


Score 3-0
Advantage Wurmwood

Baldur turn 4:

Turns out, Curse of Shadows lets any model move through the model.

The Gobber Chef and Bokur do some damage to the Pureblood, and then Baldur finishes it, putting Roots of the Earth on the Storm Raptor.

The Storm Raptor kills the Bokur, and the Pureblood assaults Cassius, killing him and the Sentry Stone next to him AND contesting.


Score 3-0
Advantage Wurmwood

Wurmwood turn 4:

I see an opening here. If I can kill the Raptor with two wyrds, a charging pair of Shamblers, and Lanyssa, I can use the other to kill the contesting Shifting Stone. I can port Wurmwood into the zone, Hellmouth the Pureblood OUT of the zone, and Hellmouth the two contesting models to death (if the Sentry Stones don't kill them first).

Long story short, it takes every single attack I have to kill the Raptor, and I don't kill the Chef.

I Hellmouth the Pureblood away from the flag, and then I just sit on four fury with no transfer targets instead of healing up to 10 boxes. I feat.

I surround the Pureblood with Shifting Stones and score again.


Score 4-0
Advantage Wurmwood

Baldur turn 5:

Tom has Baldur heal the Pureblood to full. The Pureblood Warps Ghostly and tramples to Wurmwood, killing him.


Victory for the (other) Druids!

Post-Game Thoughts:

This was such a grind. There were probably ten people watching this game just shaking their heads at the craziness as Tom and I traded advantages back and forth. I feel like I made a couple of critical mistakes in the later turns that cost me the game, although the only reason I've found them is by looking back at the game over and over and over again. ( I had a long plane ride home with not much else to do). 

If I'd gone with the plan of Feating a turn earlier and whittling the Storm Raptor down, my Pureblood would have lived, and the Raptor would have been dead after one more turn of shooting and having the Pureblood charge at the end of that. If I'd healed Wurmwood every turn after the first, I would have likely liver through the Pureblood assassination. 

Those two mistakes cost me the game. I'm incredibly impressed that Tom was able to salvage his situation after turn 2 - the guy is an incredible player. 

I'll be writing a "what now" article at some point in the next couple of days, but I was very happy with my performance at the LVO. Breaking into the semi-finals undefeated was a huge accomplishment for me, and I'm extremely excited to look ahead to the next set of tournaments in 2017. 

Thanks for reading!