Thursday, May 18, 2017

Battle Report 97: Vindictus (Exemplar Interdiction) vs. Rhyas

Image result for vice scrutator vindictus art

Prologue:

Back-to-back Scrutatorial games! Oh yes. 

Same list as last time, still working on the battlegroup and what to do with those Vassels. Current thought is drop a Seneschal and a Vassal and turn it into Gravus and a couple more Wracks.

Vindictus
- Indictor
- Indictor

Wrack
Exemplar Seneschal x2 (proxied by Errants until mine get here)
Vassal x2

Vengers
Vengers
Knights Exemplar and CA x2
Min Choir

This time I was playing a 2016 Scenario (the Pit) against a Legion pairing of Rhyas and Absylonia 2

He dropped Rhyas into me, and off we went. I won the roll off again and slammed going first.

Rhyas
- Scythean
- Angelius
- Protector
- Seraph
- Neraph

Deathstalker x2
Warlord

Swordsmen and CA


Seriously guys, this is the most appropriate sound track for this army I can think of. Just let it run while you read. 


Menoth turn 1:

No serious shooting combined with no less than 3 pieces of Cover on my half of the table means no turn one Feat.

Vindictus casts True Path, moves over to the right, casts Defenders Ward on the Vengers, and camps 1.

Everything else just runs like crazy, staying just out of charge ranges. At the end of this turn, I'm already threatening his deployment zone.


Legion turn 1:

Some unlucky dice means that the only Knight that dies is the one I left out to trigger battle driven. This also triggers Righteous Fury on the Seneschals.

The Angelius gets slipstreamed up, charges the closest Venger, but thanks to Defenders Ward misses its charge and the next two bought attacks.

Beasts run, Swordsmen spread out.


Menoth turn 2:

I upkeep Defenders Ward. Vindictus scoots out of the killbox and casts True Path before Feating.

The right hand Seneschal goes man mode and two shots the Neraph. Oof.

Vengers charge the Angelius, kill it, and Reposition out. I send in one Knight Exemplar to try and kill two Swordsmen with Cleave and Overtake, and he nails both sevens to hit. I didn't miss much this game.

Vengers on the left charge in, and with Impact Attacks and charge attacks clear off several more Swordsmen and the Deathstalkers before (mostly) repositioning into the Feat.

The middle unit of Knights runs up, and the Indictors screen Vindictus.


Legion turn 2:

His Protector frenzies, knocking down the Seneschal.

We now come to the part of the game where we spend like...ten solid minutes trying to figure out how to actually remove that model from the table.

Grievous wounds prevents it from healing, but it still doesn't kill it from my reading of the rules. If you hit it multiple multiple times, it just keeps getting knocked down and stays disabled, and the second you kill a faction model in its command it instantly heals one again.

I couldn't find a quick rules reference at the time, so we played it like that.

**********************Intermission whilst the rules forum is perused**********************

Yup. Wow, that's impressive. So for those interested, you can send all the attacks into the Knight Exemplar Seneschal you want, but it won't die unless you can remove it from play before the boxed step. At that point, if you kill anything within 9 inches of it, it heals a point and doesn't die at all.

Also, he can contest and control zones and/or flags (2016 rules) while disabled, which is not how my opponent and I played that game.

What a crazy model.

Okay anyway, Scythean cast it's animus, whacked the Seneschal, killed the Venger, and sat there.

Swordsmen walked up and killed two (!!) Vengers on the left flank, and the Seraph moved up and shot at the three Vengers it could shoot at.

14/21 is a statline though, and despite some good dice, none of them die.

We played it as though my Seneschal did not contest, although this is apparently wrong, so my opponent erroneously scored a point.


Menoth turn 3:

It's time to clean up. Charging Vengers kill the Seraph and nearly kill the Protector.

Vindictus casts True Path and sits back. Knights Exemplar charge in and cleave through most of the Swordsmen, and the Vengers finish clearing out the zone.

At the end of the turn, my opponent has a Protector on one box, a Scythean and Rhyas, and he concedes.


Victory for the Menite Druids!

Post-Game Thoughts:

After this game, I'm starting to wonder if this list needs some very specific builds to answer it. Control feats ala Haley 2 and other denial effects like Cloud Walls might be the only thing that can really handle it.

It's so fast, and it delivers itself incredibly well. I look at most Cygnar gunlines and just think "turn 1 feat, turn 2 charge you".

Definitely going to be interesting going forward. Both of these games saw me take over massive portions of the table with fairly little loss. I believe this game I lost 3 large based models (90 push ups or sit ups), two small based models (ten push ups or sit ups) and that's it. The game before I lost two large based (60 sit ups or push ups) and 2-3 small based models (ten to fifteen push ups or sit ups) simply because the list was able to come in with an extremely hard alpha and fear little retaliation thanks to the feat.

I'm excited to keep playing this list - now I just need something to pair it with.


Thanks for reading!

Wednesday, May 17, 2017

Battle Report 96: Vindictus (Exemplar Interdiction, 2017 Standoff) vs. Malekus (The Creator's Might)

Image result for vice scrutator vindictus art

Prologue:

I really like Vindictus. He, Severius, and Harbinger are 99% of the reason I got into Menoth, and the new Exemplar theme force, I feel, really gives him some neat tools. 

If you haven't seen it yet, the new theme force gives you:

+2 inches of deployment
A small or Medium based solo or CA for free for every 20 points of Exemplar models
Blessed Weapons on your Warjacks

I cooked this little number up just before heading out for games tonight, and I have to say it's a nasty looking list. 

Vindictus
- Indictor
- Indictor

Knight Exemplar Seneschal (free and proxied by an Errant)
Vassal of Menoth
Vassal of Menoth
Wrack

Vengers
Vengers
Knights Exemplar
- CA
Knights Exemplar
- CA (free)
Min Choir

The list is fast, accurate (MAT 7 is as low as we go here), and hits like a train. It cares not for terrain, and with Vindictus' feat you are almost guaranteed the alpha strike. The only thing I am not quite sold on is the battlegroup and the Vassals. I'm really not sure what I want there yet. 

I paired this with Chandler's Severius 1 list, which I would like to claim more credit for collaborating with him on then I probably deserve, but it's a nasty list and he took it all the way to top sixteen at LVO this year. You can read his analysis and theory behind the list here. (also check out his blog, it's excellent for Protectorate stuff).

Severius 1
- Heirophant
- Blessing of Vengeance 
- Eye of Truth
- Hand of Judgement

Avatar of Menoth

Vassal
Vassal
Vassal Mechanik
Vassal Mechanik
Wrack 
Wrack
Punch Monk
Punch Monk

Rhoven and Co. 
Min Choir. 

It hits hard, it's resilient, and it's weird. It's super hard to play, and it has game into nearly everything. 

My first game of the day was against my regular Menoth opponent, who had a neat Malekus list featuring the new Vessel of Judgement. We rolled up Standoff from the 2017 SR packet, and I won the roll off. With a list this quick, it's just hamstringing yourself to go second, so I chose to go first. 

Malekus (Creator's Might)
- Heirophant
- Reckoner 
- Reckoner
- Eye of Truth
- Repenter
- Repenter

Vessel of Judgement

Mechanik x2
Wrack x3
Vassal 

Rhoven and Co. 
Choir


I can't help but hear the Rohirrim theme from The Lord of the Rings whenever I line two units of Vengers up to play a game. It's such a cool looking deployment. 


Vindictus turn 1:

Vindictus goes first, casting Defenders Ward on a unit of Exemplar's to his left, True Path on himself, and advancing 8 inches. 

Indictors run up next to him, and then everything runs. 

It occurs to me that I actually have to worry about getting shot at turn 1, so I carefully check 17 inches from his Reckoners and 16 from the Vessel before committing my Cavalry models to their final location. 

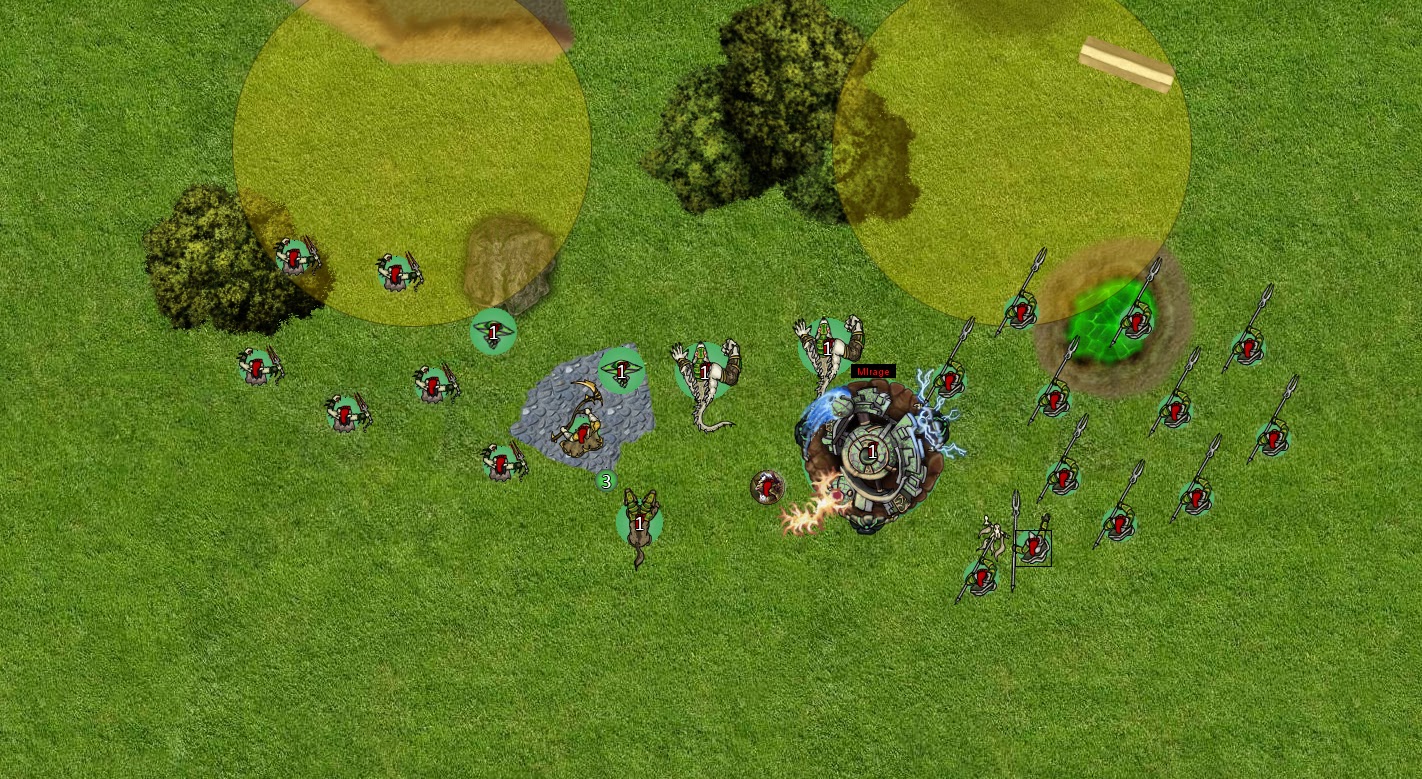
The Cavalry units get into the circular zones, threatening to murder anything that comes near them. 

The Knights come up the middle and get ready to bruise things. 11 inch threat on them is pretty spectacular. 

I deliberately give my opponent a Venger on the left to shoot at in the trench, hoping he'll proc battle driven. 


Malekus turn 1:

In a surprisingly aggressive move, my opponent runs his jacks up. Malekus uses Open Fire a couple of times after Battle is sung, and he successfully clears off a Venger on the right. (30 push ups or sit ups), triggering Righteous Fury on the Seneschal and Battle Driven on the Vengers. 

He runs the Vessel up max distance - a move which I believe was his only major mistake this turn as it would allow me to charge it with multiple units. 

Enliven goes on the Repenter on the right before it heads into my zone. 


Vindictus turn 2:

I premeasure out a couple of threat ranges, and with True Path I can get two Knights Exemplar onto the Battle Engine, and I can also get all of the Vengers onto it with good placement. 

I upkeep Defenders Ward, allocate nothing, and get to work. 

Vindictus moves up a little bit, casts True Path and Feats. 

The Seneschal on the right goes up and hits the Repenter, triggering Enliven. The jack moves closer to me to Jam, and the free strike and charge attack combined do around half damage to it (pretty mediocre dice there, should have brought it down to one or two). 

The Knights Exemplar activate, pop their mini-feat for mini Hand of Fate and charge. Two go into the Vessel, bringing it down to 2/3 health, the other three that can get there charge the Repenter. 

The first attack leaves it on one, and the officer finishes it off before overtaking out of the way. 

This leaves the Vengers clear to charge into the Vessel, taking it down on the last attack before Repositioning mostly back into my Feat. 

On the right, charging Vengers kill the Repenter and Reposition back into Feat range. 

I move both Indictors in front of Vindictus, and move up the middle unit of Knights cautiously. 

The Choir sings no shooting on the jacks, and I end my turn. 


Malekus turn 2:

My opponent has nothing but bad options here. If he commits, he loses his army, if he doesn't I instantly win on Scenario. 

His Reckoners move up and bash stuff, Eye aims and misses a shot at a Venger. Malekus uses Open Fire to nearly kill the right hand Venger that's outside of the Feat. 

He contests both Circular zones, and I had moved my jacks not quite far enough to hit the Rectangular one, so no points are scored. 


Vindictus turn 3:

The turn starts off with Righteouss Furied Seneschals moving up and half killing AND smiting down both Reckoners. 

Charging Knights and Vengers finish off the downed Jacks, Rhoven, and basically everything of scariness left but Eye and Malekus. 

I score three points as I move my Jacks into the zone, and my opponent concedes with no way to kill enough models to matter and no way to keep contesting in the face of that many weaponmasters and cavalry. 


Post Game Thoughts:

This list is very impressive. It's got excellent damage output, it's incredibly fast, and it delivers itself pretty well. Into most gunlines, this list is going to get in their face too quickly for most of them to shoot their way out before Scenario collapses on them. 

My opponent commented that it was exactly zero fun to play against, and for a list like his, I definitely agree. It punishes most battlegroup heavy builds and lists built to fight battlegroups by being faster than them and being so resilient to a lot of the anti-infantry tech out there by nature of high ARM values and Vindictus' feat. 

Definitely intrigued, looking forward to trying it again. 


Tuesday, May 16, 2017

Dojo Day - The New Tuna


Prologue:

Una 2 came into the world last November, and almost instantly was banned in casual games by my local play group.

With a Feat that meant her entire army was safe from retaliation and a swarm of Griffons that she could stay 28 inches away from and still be forcing them, she was definitely over the power curve.

Since then, she's faded out of the competitive scene as Circle's list options have, by necessity, diversified.

Still, she delivers speed 9 light warbeasts that are essentially mat 8-10 PS 12-14 weaponmasters, and that can't be a bad thing right? She also has the extremely interesting spell Hand of Fate, and I can't help but think that she still has plenty of game.


Una's Card:

Real quick overview - average everything statwise, another 15/15 with 15 boxes. She's fury 7 which is great, and speed six.

She has an excellent gun, range 10 pow 10 with reload 2 that can either Thunderbolt, Black Penny, or Snipe.

She gives Griffons in command (8 inches) Sprint and gives Griffons in control Flank.

She has for spells:

Hand of Fate - additional dice to hit and damage for a model/unit, drop the lowest.

Wind Wall - prevents her and anything completely within 3 from making ranged attacks, and prevents her and anything completely within 3 from being targeted by non-magic ranged attacks.

Mirage - an interesting but oft maligned spell that gives a model/unit apparition.

Twister - random pow 10 nuke with a 3 inch cloud AOE attached to it.

Feat - Models with flight gain +2 speed, light warbeasts with flight cannot be targeted by melee attacks for a turn.


Synergies:

Griffons - naturally, and Scarsfells are still the far superior Griffon of the bunch. Three initials, Stealth, and a great animus.

I like running these in even numbered pairs, since you usually run/charge one to engage something and then charge it with another Griffon for flank.

Woldwyrds - these guys are staples of the Circle roster right now. Good damage output from range, high maneuverability, excellent control elements in Purgation and Witch Hound. Wanna see something funny? Purgation and Hand of Fate at the same time. Delicious.

Gorax/Feral - you really need to have Primal in this list. Those Griffons have one job, and one job only, and that is to kill things worth way more points than they are. Without Primal, that gets much less likely to happen.

Units that shoot - Reeves, Sentry Stones, Bloodtrackers. Mirage lets the non-Sentry Stone ones get closer, and then Hand of Fate lets them do silly things at range.


The list:

Combining all of the elements I've just mentioned, you get something like this

Theme: The Wild Hunt

Una 2
- Pureblood
- Scarsfell x4
- Gorax
- Woldwyrd x2

Wolves of Orboros (min)
- CA
Reeves of Orboros (max)
- CA
Shifting Stones


I chose The Wild Hunt for a couple of reasons.

First of all, it lets Una play with everything she likes to play with (Except the Celestial Fulcrum, but that is an article for another day), gives her a few free points, and provides incentive for your opponent to move their army into the middle of the table.

Luckily, this is just where you want it to be, since Scarsfells are hard to hide from.

Finally, it also gives the Pureblood tracker, which on occasion can be complete money.

The list is basically a gunline that then punishes you for engaging it by killing stuff with high MAT weaponmaster Griffons.

Hand of Fate goes on the Reeves or a Wyrd most likely until it's go turn, in which case it gets swapped to the Pureblood or a Griffon depending on what you're fighting.

What would I drop this into?

I'd be looking at Legion, Trolls (I think, I don't get to play that matchup much), other Circle lists, Khador lists that don't skew crazy heavy on jacks, a lot of Menoth lists out there, even Amon with Dervishes (Crusader spam is probably bad), and potentially Cryx as well.


What do you think? How would you build Una right now? Would you even play her? How viable do you think she will be in SR 2017?

Monday, May 15, 2017

Battle Reports 94 and 95: Losing and Learning From It.

Prologue:

I haven't lost back-to-back games since the ATC in early March, and before that, I don't think I have lost back-to-back games in six months or so.

That all changed this last week with a pair of games, and instead of writing up typical battle reports, I thought I would take my usual process of chewing apart every single turn for more optimal plays and share it with you.

When I say taking apart every single turn, I literally mean every single turn. I still remember (and occasionally run through) a loss in the finals of a Steamroller last August (I think?) where Sorscha spiked some dice to take down Wurmwood.

On the drive home (it's 2.5 hours each way to Spokane), I came up with no less than six separate, superior plays for that situation, literally working the turn to death in my head.

I have also noticed that, as of late, I've started to get lazy with my placement again, and since the whole purpose of writing this blog was to help me analyze and improve my game play, I think it is high time that I address that with a seriously hard critique of my games.

Battle Report 94: Mohsar vs. Severius 2 (Creator's Wrath)

Prologue:

Because of my limited pool of local opponents, I occasionally am able to use the internet and Vassal to play games with buddies of mine from across the country.

On this occasion, I had paired up Mohsar with Wurmwood to try out against a Severius 2 and Amon pairing.

Upon realizing that Amon basically had no chance into Mohsar, we decided that Severius 2 into Mohsar would be the best game and off we went.

Mohsar
- Pureblood
- Pureblood
- Woldwyrd
- Woldwyrd
- Argus

Fulcrum

Bloodweavers
Wolves of Orboros
- CA

Gobber Chef

vs.

Severius 2
- Heirophant
- Reckoner x3
- Redeemer
- Revenger
- Blessing of Vengeance

Vassal x2
Covenant of Menoth
Wrack

Choir (max)
Rhoven and Co

I won the roll off and went first, unfortunately I forgot to take deployment screenshots of my stuff, but I got my opponent's just fine. We were playing Outlast.


I deployed pretty centrally with the Fulcrum skewed right. I didn't want to get it wedged between the obstruction in the left zone and the forest.

Circle turn 1:

Everything runs, Wolves on the right, Weavers on the left. I know the infantry is basically going to be useless this game so I don't think about where I am placing it too hard.

Mohsar puts Mirage on the Fulcrum and Sunhammer on himself.


Menoth turn 1:

Everything powers up and advances or runs. The Redeemer scatters into some Wolves, nearly killing the foremost two, but matching Armor on the second one.

The Revenger runs up and Sevy shoots a free Rebuke through it to catch my Wolves.

I apparently forgot to take a screenshot of this turn as well. Derp.


What I could have done better:

I didn't need to get my Wolves within 20 inches of his Revenger on that side. Sure, measuring 20 inches on Vassal is a bit messy, but it can be done and I should have just not done that. The forthcoming Rebuke really messed up the game for me.

I also screwed up my Fulcrum placement hard with the Wolves since it could only Apparate like..an inch forward? If that. I also think I should have committed my Purebloods both to one side since Scenario should have been my win condition here, but I was too caught up in the idea of gunning down a heavy a turn.

What did my opponent do really well:

He deployed an Arc node on either side, making my turn one angles for infantry really difficult without getting Rebuked. 

He also picked the correct side of the table, with excellent defensive terrain.


Circle turn 2:

Rebuke on my Wolves is basically the worst thing that could happen, and without it I could have swarmed him good this turn.

Instead, I move up and nearly kill his middle Reckoner with a combination of Woldwyrd and Pureblood shooting.

I put down some defensive Pillars of Salt and Feat, catching everything but the Redeemer and Revenger.

Bloodweavers run like crazy, engaging stuff and threatening Severius himself if he doesn't clear them out next turn.


Menoth turn 2:

Sevy allocates three focus to the right-hand Reckoner, two to the Redeemer, and stuff starts happening.

Sevy Feats, killing all of the Bloodweavers.

Jacks move around on the left, getting in the zone and preventing me from scoring.

The Right-Hand Reckoner charges my Pureblood and does about half damage. His Redeemer does about half the damage on the Fulcrum with its rockets.


What I could have done better:

I'm not totally sure why I moved that Pureblood up to be honest. I think I went for a cheeky spray into the Reckoner to start the damage train, and that was completely unnecessary.

This turn was actually not that bad. I kept Mohsar in the rubble, fairly safe from most spell assassinations.

I think I probably should have hung back with my Bloodweavers. He might have gone for my Wolves with his Feat then, and my Bloodweavers were much more useful without Rebuke on them.

What my opponent did really well:

He played nice and defensive, giving me one jack to play with but not letting me get at it with anything but a Pureblood and some Wolves of Orboros that couldn't charge.

He also capitalized on his Redeemer having a good target and went after it. There was little I could have done about that and it did make a big difference.


Circle turn 3:

I have delusions about clearing the right hand zone this turn that go something like this: Fulcrum kills the Revenger, Pureblood kills the Reckoner, Mohsar goes over there with Sands of Fate.

Unfortunately, none of these things happen, and instead I commit two Purebloods to the Reckoner, leaving it on about 6 boxes, leave the Revenger on two boxes, and use my Woldwyrds to shoot at his third Reckoner instead of shooting down the really damaged on in the middle of the table.

What I should have done is used both Purebloods to melee down the Reckoner instead of having the second one spray it, used the Woldwyrds to shoot down the Reckoner in the middle with approx. ten boxes on it, and then jammed the Revenger with Wolves after shooting it with the Fulcrum OR just running the Fulcrum away.


Menoth turn 3:

His Redeemer shoots down the Fulcrum with a spectacular damage roll.

His damaged Reckoner in the middle of the table charges my Pureblood in the back and between it and the first Reckoner and Rhoven and Co. kill it pretty dead.

The Covenant sings No KD, and the pillar body blocking my Wyrds get shot off the board, followed by a charging Blessing who kills one of them.


What could I have done better:

Well...I could have finished off his Jacks for one thing. I could have kept my Pureblood out of charge range of Rhoven and Co. 

Thing is, up until this turn, I was feeling pretty good. He had two heavies with 11 boxes between them, a Revenger with 2 boxes left, and a Reckoner way off to the side. If I'd just had better target priority, I could have made it so that he didn't have either of his intact heavies, and also prevented the two Weaponmaster charges into the Pureblood. 

This actually leaves me with a ridiculous assassination threat on the table at that point as both Purebloods can trample up or move and spray once Mohsar goes in to apply Doppler Bark. 

This is really the turn where things fell apart for me, and it was simply because I got distracted and didn't finish the job. Dead heavies don't kill you stuff back, crippled heavies can. 

What my opponent did really well:

He used all of his resources, and I mean all of them. The Reckoner in the middle only had movement and Cortex left before it charged in, and he managed to connect with my Pureblood and bash the snot out of it. 

I had not considered Rhoven and Co. as an offensive piece yet because I felt like Sevy would be too vulnerable without his Shield Guards, but by eliminating my Pureblood there, he didn't really need them anymore. 

Circle turn 4:

Desperation time. Mohsar drops everything. 

Pureblood goes Ghostly and moves around the Reckoner, but stays within 2 because....no reason really, and so becomes rat 3, missing Sevy by 2. 

Wolves move in, kill choir, and Reposition forward. Mohsar maltreats the Pureblood, Sands of Fates to the Wolf, casts Doppler Bark, but cannot seal the deal, not doing any damage with his first three attacks. 

I call it at this point. 


What could I have done better:

Well...I could have maybe tried to play for attrition. 

The Reckoners have about 8 boxes between them thanks to Sunhammer (remember they had like 11 between them before they charged in), so I could used the Pureblood to potentially move around them and spray both of them down from inside the zone, or at least spray the one in the zone and also Rhoven. 

I have four Wolves of Orboros left and the Revenger has two boxes. They could go in on it, and then if they fail, Mohsar could Sands to one of them and the Sands to the Standard Bearer behind the wall to potentially not die from a charging Sevy. 

At that point I go 2-0 with an intact Pureblood who would be out of charge range of all of his models thanks to the forest, and my opponent has to start throwing things away to contest. 

Ah Hindsight. 

I could also have done the same thing, but moved the Pureblood more than two inches away from the Reckoner, meaning my spray from him would have hit. I could have also done that last, after Sevy had had his defense reduced to 5 so it wouldn't matter. 

Post Game Thoughts:

Lots of things I could have changed, lots of ways I could have mitigated dice. 

It's pretty incredible how a series of small misplays can just spiral the game out of control. It's actually one of the mantras I used to recite to myself before tennis games - unforced errors are not how you win games. 

Warmachine is an extremely complicated, tactically dense game, and it's always important to look back at the games you play and check yourself to see how you can do better than you did, whether you won or lost. 

This next report hammers home a different, arguably more important general idea rather than looking specifically at the things I could have done better. Only one of them mattered. 


Battle Report 95: Vindictus (Exemplar Interdiction) vs. Rasheth

Prologue:

Vindictus
- Reckoner
- Reckoner

Knights Exemplar Seneschal x2 (Free!)
Wrack
Gravus

Vengers Max
Vengers Max
Knights Exemplar
Knights Exemplar

Vs.

Rasheth
- Hydra
- Despoiler
- Gladiator

Soulward
Paingiver Master Tormentor x2

Tyrant Commander and Standard
Beast Handlers
Bloodrunners


I unfortunately lost the roll off, meaning that I had to go second. This is a problem for this list since my threat ranges are so massive (15 inch threat on Vengers is amazing) that I really want to take up the table space and not let him have any of it.

There's nothing I could have done about this here, so onto my deployment.


My game plan here is to use the Vengers to set the line of skirmish firmly on his half of the table. He simply doesn't have enough attacks to really clear everything I throw at him, and I am going to feat turn one in order to insure the alpha strike.

After that, and probably after his Feat, I get to charge in with two units of Knights Exemplar (who actually threaten 11 inches in this list) and their Seneschals, not to mention two Reckoners which, thanks to the new Fuel Cache objective, can go in through the forest to finish off the Hydra should it survive.

I think my Deployment here is fine for that game plan. Vengers will get up the table very quickly, limiting where his Bloodrunners can go. A turn 1 feat means that his Master Tormenters will have to walk up to combat with the Vengers, likely not killing any with thresher and then sitting there waiting to die.


Skorne turn 1:

My opponent moves everything up the table as far as it can go, with the exception of the Master Tormenters and the Bloodrunners.

Already I am giving him headaches with the threat ranges on the Vengers, and he spends about 5 minutes on the right hand Tormentor to make sure it cannot be charged this early.

I notice Rasheth shifting to the left, and I think this is going to be a strong Scenario game for me based off of that. He cannot protect all of the zones well enough, and I might actually be able to score three on my second turn.


Menoth turn 1:

I set up my army pretty well here. The Vengers in the left zone will come into the Hydra from where I put them and anything else that ventures into there will simply get slaughtered.

I've put my Reckoner just outside of Hydra walk range, so if he wants to get at it he needs to trample. That being said, the Hydra is in charge range of the Reckoner, so he needs to either move back or (probably) die next turn to charging Cavalry and a charging, Battled heavy.

My critical mistake here? Not checking one crucial distance.

I make sure that Vindictus will be outside of the Hydra's trample range, but I fail to consider the sprays. I also fail to consider the Despoiler, and running 12 inches to apply Dark Shroud.

Let's do some math here.

Hydra gets five sprays, and under Rasheth Feat he needs 7s to hit and is dice -2. He has no other attacks since Vindictus popped his Feat, so no spells, no charges into Vindictus, nothing.

Vindictus is camping 3, and my opponent will (next turn) boost hit and damage on the first two sprays, leaving the last three to chance.

Oddsmachine puts this at a 22% assassination run.

With Dark Shroud, that number goes up to 56%.

This is all well and good, but had I chosen to place Vindictus a quarter inch farther from Despoiler, it would not have mattered (dice went funny).

Other options I have include:

Put my Reckoner farther up to make my opponent need 9s to hit Vindictus.

Build a Reckoner wall in front of Vindictus 4.1 inches (I think this is probably a bad idea since my opponent can reasonably trample up to and cripple one of them with the Hydra and possibly charge the other with Despoiler).

Cast Defenders Ward on Vindictus instead of True Path and camp 4 (Ultimately wouldn't have mattered with my opponents dice, but it takes the assassination run down to a 3.29% assassination WITH Dark Shroud and a 0.17% chance without it. Actually even with my opponents dice, that would have made enough of a difference to prevent the first two boosted sprays from killing Vindictus)

What I should have done instead of all of those options is prevented my opponent from rolling any dice by keeping Vindictus three quarters of an inch farther away from the Hydra and not letting him even have the chance.

This is the biggest lesson, I believe, of risk mitigation in Warmachine. The less dice you allow your opponent to roll, the better your game will be. Vindictus did NOT need to be that extra smidgen of movement closer to my opponent's Hydra. Take that off the table and my opponent has no good options.

He can't get to my Vengers on the left with anything but Hydra Sprays, and he's going to kill the two he is in range of, trigger Battle Driven, trigger Righteous Vengeance on the Seneschal next to him, and then he will take three boosted PS 14 lances, 2 PS 11 Weaponmaster attacks, one a charge, a few PS 9 Weaponmaster charges, and a Reckoner charging him with Battle up.

Even under Rasheth's Feat, I think that Hydra is dead.

On the right side, his prospects are even worse, as to get the Vengers under Rasheth's feat, Rasheth has to be incredibly exposed. I probably lose one horse at worst, and then sweep that flank.

I am in a very good position here EXCEPT....

I've left Vindictus in a place where my opponent gets to roll dice against him.

Now, it still takes a good player to realize that all of this is an option - I sure didn't see it until it was happening. Many people would have just let me sit there and set up to take the Alpha - props to my opponent for taking the opening.


Skorne turn 2:

The Despoiler Runs, Rasheth Feats, and my opponent rolls very well, killing Vindictus in two sprays.


Post-Game Thoughts:

I had all the information, I had all of the tools, I just got lazy and didn't consider the Hydra Sprays a legitimate threat. I got lazy, I got complacent.

I got too caught up in how freaking incredible my turn 2 was going to be, and didn't consider how vulnerable I had left myself. I could have done many things differently to make the dice math worse for my opponent, but again, I could have just not let him roll dice at things that mattered.

This is one of those games that you don't ever forget, and they usually jump start you to play better the next time you set your models up. In the game I played today with Harbinger for example (see battle report 93), I tripled checked the threats he could get onto Harbinger every. Single. Turn.


Conclusion:

Every loss is an opportunity for growth. One of my favorite movies as a kid was "Chittie Chittie Bang Bang", and my favorite song from that film is called "From the Ashes".

The line in particular is "From the Ashes of disaster grow the Roses of Success".

It's a rousing little tune, and it's really fun to watch a bunch of old guys bluster about. That being said, they have a point - learn from your mistakes, be honest with yourself, and don't begrudge your opponents their wins.

The object of the game is to win, the point of the game is to have fun. Actually the object of the game is to win, the point of the game is for both players to have fun, and that's something that I, personally, need to work on.

Battle Report 93: The Harbinger of Menoth (Vessel CID) vs. Absylonia 2 (Children of the Dragon)


Prologue:

One of the main reasons I originally bought into Menoth's fluff, the Harbinger of Menoth saw some drastic changes between Mark 2 and Mark 3, fading out of the competitive scene and becoming more or less universally bemoaned.

The recent Vessel of Judgement CID changes have brought her back into the fore of my interest when it comes to Warmachine, as Martyrdom + Bastions + Healing all the Bastions sounds pretty good to me.


My pairing was a Harbinger list paired with Vindictus in the Exemplar theme, and my opponent had Rhyas and Absylonia 2 Shredder Spam.

I didn't even really pay attention, as I was playing Harbinger into anything not named Lylyth 3.


I don't think this list is optimized yet, but it's a decent place to start.

The Harbinger of Menoth
- Heirophant
- Devout
- Vigilant
- Templar

Punch Monk!
Vassal Mechanik x2
Rhuper Carvolo, Piper of Ord

Vessel of Judgement

Bastions (proxied by Cinerators)
Bastions (proxied by Blood Pack)
Min Choir

vs.

Absylonia 2 (Children of the Dragon)
- Proteus
- Protector
- Shredder
- Shredder
- Shredder
- Shredder
- Shredder
- Shredder
- Shredder
- Shredder
- Shredder
- Shredder
- Shredder
- Shredder
- Shredder
- Shredder
- Shredder
- Shredder

Spell Martyr x2
Nyss Warlord x2 (Proxied by Deathstalkers)

Blackfrost Shard


Umm...yeah...that's a lot of Shredders. I've seen 3-4 of the little buggers kill heavies under Aby 2 with Kiss of Lylyss up.

We rolled up Spread the Net for our Scenario, and I ended up going first.

I forgot to take a picture of all of my deployment, so basically imagine Harbinger, Bastions, Templar, etc. back 9 ish inches.


Menoth turn 1:

Easy things first, Shifting Sands Stance on the Punch Monk and move him up. The idea is to move him into the left zone and keep him there with Martyrdom and Stance (Spoiler, I forget to move into Martyrdom range like...every turn).

Harbinger casts Crusaders Call and charges into the trench.

Everything else Charges or runs, but most things charge since speed four models get 1 extra inch out of a charge with Call up.


Legion turn 1:

Shredders all run (surprise?).

Absylonia puts Bracer on Proteus and charges up.

The Blackfrost Shard and other solos make a beeline for the left zone, with a couple of Shredders in tow.


Menoth turn 2:

Harbinger can actually have a useful feat turn! I allocate nothing.

Bastions run up, and the Vessel advances. Between its two shots, it kills two Shredders and nearly kills a third. Rolls were a touch low. It takes about 10 damage and gets healed back up to 5 off by the Mechaniks.

The Tharn Bastions run up and screen Harbinger.

The Harbinger activates, moves up, camps a bunch and pops her Feat.

Everything else moves to make it basically impossible for Proteus to get to her without two bastions dying, which isn't happening thanks to Martyrdom.

The Choir sings Shielding (No Spells), and the Punch Monk moves into the Left Zone.


Legion turn 2: 

My opponent surprises me and commits five Shredders to jam my lines up, and my feat leaves all of them on 5-6 boxes. Surprisingly, Bastions go to DEF 15 against charges from living models (11 base, set defense, and Awe) when they're with Harbinger, so none of his charge attacks hit.

Aby casts Psycho Surgery and gets onto her flag, with Proteus and friends in front of her.

My opponent makes a wall of dudes around my Punch Monk, and puts five or six attacks into it, but in vain.

My opponent scores a point.


Score 0-1
Advantage Legion

Menoth turn 3:

Once again, no allocation.

The Vessel moves up, uses Eruption of Faith to destroy two Shredders in front off the Bastions. It then zaps another Shredder and misses an engaged Shredder.

Mechaniks heal it up to about 7 off.

The right hand Bastions go ham, killing four Shredders between them. At dice -2 and four dice damage, they pretty much one-shot the lesser beasts.

My Templar goes in and unjams the Left Unit, and Harbinger goes, casting Guided Hand on them - I thought I was going to be able to clear the zone, but my opponent points out to me that he has a Blackfrost dude in as well.

The left Bastions kill three more Shredders.

The Punch Monk does Shifting Sands Stance and whacks the Shredder next to him. In Hindsight, I should have killed the two Spell Martyrs so that I could move away if I was missed next turn.

I was luckily contesting the flag with a Bastion, so no points are scored.


Score 0-1
Advantage Legion
Legion turn 3:

Aby charges and kills the right hand Bastion, Feats, and Repositions. 

Proteus and friends kill the rest of the Bastions (Grievous Wounds, it's a thing) in that zone. 

Once more the Punch Monk fails to die. 

No points once again. 


Score 0-1
Advantage Legion 

Menoth turn 4:

I start things off with a Harmonious Exaltation. The Harbinger Purifications off Buckler and then the Vessel blasts Proteus for about 15 damage. 

Three charging Bastions finish the heavy off, kill a Shredder, and ding up the Protector. 

Punch Monk whiffs all of his attacks on the Shredder on his side, and a Vigilant caps the right zone for me. 


Score 1-1
Tie!

Legion turn 4:

One of the Warlords connects with my Punch Monk, and Decapitation prevents Tough. 

Aby runs away, and we both score a point. 

Look how scared she is...that's her on the bottom right. 

Score 2-2
Tie!
Menoth turn 5:

The Protector is about a third dead, and I figure a bunch of charging Weaponmasters should be able to take it down. I had forgotten that Children of the Dragon gives Nephilim Unyielding though, so ARM 20 was a bit of a shock. 

I waffle about a bit, and then send the Bastions in. They...almost all miss. 

The Templar walks up and... does a couple of damage. 

The Vessel moves up and draws LOS to the Warlord through the Stealthed up Blackfrost Shard, but it misses both of its boosted shots. The Healing Miracle goes up, and the Mechaniks go repair it up to about five boxes. 

Harbinger moves up away from Absylonia, and we both score again. 


Score 3-3
Tie!

Legion turn 5:

He tosses away a member of the Shard to kill a choir member and tie me up. The Protector flails ineffectually at a Bastion. Absylonia scoots around. 

Both Warlords pile in behind the house, and once more we both Score. 


Score 4-4
Tie!

Menoth turn 6:

I realize here that if I don't decisively take the lead here, my opponent is going to basically be able to take me point for point and then potentially contest the 7th turn to win.

With that in mind, I allocate three to the Templar and run the Choir leader to contest.

The Vessel blasts the Shard member off the table and heals up. Harbinger moves away from Absylonia. Once again, all of the Bastions either miss or bounce off the Protector, as does the Templar. My opponent and I are laughing hysterically about the thing surviving at this point.

I score and my opponent does not.


Score 5-4
Advantage Menoth! (Almost typed Circle out there)

Legion turn 6:

Absylonia runs to her flag. Whoops...The zone on the left gets cleared and the Shredder that's been controlling it all game moves up a bit. 

He scores two and I score 1. 


Score 6-6
Tie!


Menoth turn 7:

Last turn!

I run Harbinger to HER flag. I finally kill the Protector, and I run Bastions to make it impossible to contest my flag.

I run a choir boy to contest the flag and another into the zone, while my overloaded Devout kills the Spell Martyr in one shot.

I score two points.


Score 8-6 
Advantage Menoth!

Legion turn 7:

He cannot contest, but he can make me do push ups and sit ups for our Warmachine Fight Club. 

Both Choir die, as does the Devout, and then I score two more points to his one and the game ends. 


Score 10-7

Victory for the Menite Druids!

Post-Game Thoughts:

In a slow, attrition fight into an army with literally no guns, Harbinger and the Vessel are amazing!

I feel like the Vessel is extremely potent right now, which is great. I'm not sure if it's too strong, it definitely could be slightly too powerful, but it feels meaningful, impactful, and significant - which it should for 20 points. 

Bastions are too squishy, getting one-shotted by a LOT of stuff - only Martyrdom really kept them in this fight. 

The Scenario felt at first absurdly dead and then around turn six became absurdly important - I'm not sure if that is intended or not but while I was comfortably ahead on attrition, I could have lost this game if I had passively just let the game go where it was going. 

Overall, a very interesting game. 

Thanks for reading :)


Thursday, May 11, 2017

Battle Engine CID Week 3: Celestial Fulcrum


A quick touch on the latest changes to our (extremely pretty) battle engine. 

The original CID Fulcrum gained the following:

+10 boxes (30 total)

Fury Vault (Your warlock can give it fury during the Warlock's activation, to a max of three)

Quieting the Stones - able to leach Fury from Friendly Faction construct warbeasts within 5".

Veteren Leader [Blackclad] - Blackclad models within 10 inches of this model get +1 to hit. 

It also lost Fury Generator, so it no longer creates Fury every turn to supplement what it pulls from Wolds. 


This week, the CID packet gave us the following changes:

Reduce cost from 19 to 18. 

Reduce boxes by 2 to a total of 28. 

Lose Fury Vault. 


I was all onboard with the changes until I saw the last one. The Fulcrum was a bit pricey, fitting it into lists with an odd points cost in Circle is hard since we have access to a single one point model, so seeing it go down to 18 points is nice. 

I can also understand the drop in boxes - the Fulcrum is immune to electricity (Cygnar Shooting) Fire (Menoth and Legion Shooting) and Corrosion (Cryx Shooting), and so it's already fairly hard to kill at range. 

Losing Fury Vault....well that might be a deal breaker. 

I'm going to be echoing some of the thoughts Dan Y. posted on the CID forum, since he raises several valid points. There will be some expansion with my own ideas, but the framework is his.

In order to fuel the Fulcrum, you were already playing two Woldwyrds, making it a 37 point module - that's the same point cost as a Woldwrath. 

Why Woldwyrds? Well let's take a look at our other options. 

Ranged:

Woldwrath - this is honestly one of the better choices to run with the Fulcrum - it can fully fuel the Battle Engine by itself, doesn't want to commit to the fight too early, and between the two of them you can block LOS to your Warlock easily. 

That being said, a Woldwrath and a Fulcrum is now 55 points, which is well over half of your list, and while it is a solid gunline (two boostable POW 15s, a boostable POW 14, and a boostable POW 12), the Fulcrum needs to be quite a bit closer to the fight than the Woldwrath does in order to utilize its guns, meaning you might be exposing your colossal earlier than you would normally want to. 

Woldwatcher - inferior to the Woldwyrd in every way except surviveability, I never even consider this model when building lists. It has no role, it serves no function, and it cannot do enough damage to justify including it. 


Melee:

Megalith - this is probably the next best escort for the Fulcrum after Woldywrds. He almost always has a spell to cast, is hardy, fuels the Fulcrum alone, and is just all around a solid piece. 

He's also 20 points, bringing this module to 38 points now, or again, the cost of a colossal. 

Woldwarden - the budget and seriously inferior version of Megalith, this guy is not a terrible choice for some lists, but at Fury 3 and PS 16, he's not denting most heavies, and at Mat 6 with no Mat buff, he's not killing infantry en masse either. Add to that his inability to fuel the Fulcrum should he commit to a melee target some distance away and I find myself shying away from this guy. 

Woldguardian - I like this guy least of all. He contributes nothing to the Fulcrum's damage output until very late game, is expensive, has low melee damage output, and, like all of the other melee options cannot fuel the Fulcrum if he goes in to the melee fight.


Let's recap - outside of the Woldwyrd, we have a couple of decent options in Megalith (can't be taken in theme with most casters) and the Woldwrath. 

Melee options aren't good because, simply put, they're in there to get in melee, which will often leave them far out of the way from where the Fulcrum wants to be in order to pull fury. 

This doesn't even account for the fact that outside of the Wrath, Wyrd, and Megalith, the Wolds are bad beast options - expensive and pillow-fisted. 


Okay...soo.....?

Apart from this, the fact that you have to take other (expensive) models in order for the Fulcrum to do anything is a problem. None of the other battle engines have such stringent requirements to be effective. 

In Skorne, Beast Handlers are a small points investment and are almost always in the list anyway. 

Menoth mechaniks are 1 point a piece. 

None of the other engines that I can think of require any support at all. 

In order to make the Fulcrum effective, you must now bring an additional (minimum) of 16 points for a Woldwarden to tail it around all game, making our battle engine actually a 34 point model. 

Thirty. Four. Points. 

Now I know that the default is going to be a Fulcrum and Two Wyrds (37 points guys), but that is a module that has a relatively short threat range for a ranged package - heck, Menoth Reckoners have the same ranged threat as a Woldwyrd - and is completely reliant on the Spirit boxes of two ARM 16 lights be intact. 

This package is only one Woldwyrd nerf away from being borderline unplayable, as many of the Fulcrum's native weaknesses (no way to mitigate RAT outside of aiming or getting crit freeze and short range guns) are made up for by its ability to boost. 


Suggestions:

Give it back Fury Vault - this is my preferred as it allows it to be taken with many Warlocks who wouldn't otherwise. 

Reduce the point cost and give it back Fury Generator. 

Increase the range of Quiet the Stones from 5 inches to 10 inches - I don't like this one as much because it still makes the Fulcrum less and less useful as the game goes on AND keeps it completely reliant on bringing almost twenty points of other models with it. 


I'm going to hopefully get a couple of playtest games in with the current rules this weekend, but first impressions lead me to believe that this iteration of the Fulcrum is probably worse than it's pre- CID rules.