Showing posts with label Scenario Tactics. Show all posts

Monday, May 15, 2017

Battle Reports 94 and 95: Losing and Learning From It.

Prologue:

I haven't lost back-to-back games since the ATC in early March, and before that, I don't think I have lost back-to-back games in six months or so.

That all changed this last week with a pair of games, and instead of writing up typical battle reports, I thought I would take my usual process of chewing apart every single turn for more optimal plays and share it with you.

When I say taking apart every single turn, I literally mean every single turn. I still remember (and occasionally run through) a loss in the finals of a Steamroller last August (I think?) where Sorscha spiked some dice to take down Wurmwood.

On the drive home (it's 2.5 hours each way to Spokane), I came up with no less than six separate, superior plays for that situation, literally working the turn to death in my head.

I have also noticed that, as of late, I've started to get lazy with my placement again, and since the whole purpose of writing this blog was to help me analyze and improve my game play, I think it is high time that I address that with a seriously hard critique of my games.

Battle Report 94: Mohsar vs. Severius 2 (Creator's Wrath)

Prologue:

Because of my limited pool of local opponents, I occasionally am able to use the internet and Vassal to play games with buddies of mine from across the country.

On this occasion, I had paired up Mohsar with Wurmwood to try out against a Severius 2 and Amon pairing.

Upon realizing that Amon basically had no chance into Mohsar, we decided that Severius 2 into Mohsar would be the best game and off we went.

Mohsar
- Pureblood
- Pureblood
- Woldwyrd
- Woldwyrd
- Argus

Fulcrum

Bloodweavers
Wolves of Orboros
- CA

Gobber Chef

vs.

Severius 2
- Heirophant
- Reckoner x3
- Redeemer
- Revenger
- Blessing of Vengeance

Vassal x2
Covenant of Menoth
Wrack

Choir (max)
Rhoven and Co

I won the roll off and went first, unfortunately I forgot to take deployment screenshots of my stuff, but I got my opponent's just fine. We were playing Outlast.


I deployed pretty centrally with the Fulcrum skewed right. I didn't want to get it wedged between the obstruction in the left zone and the forest.

Circle turn 1:

Everything runs, Wolves on the right, Weavers on the left. I know the infantry is basically going to be useless this game so I don't think about where I am placing it too hard.

Mohsar puts Mirage on the Fulcrum and Sunhammer on himself.
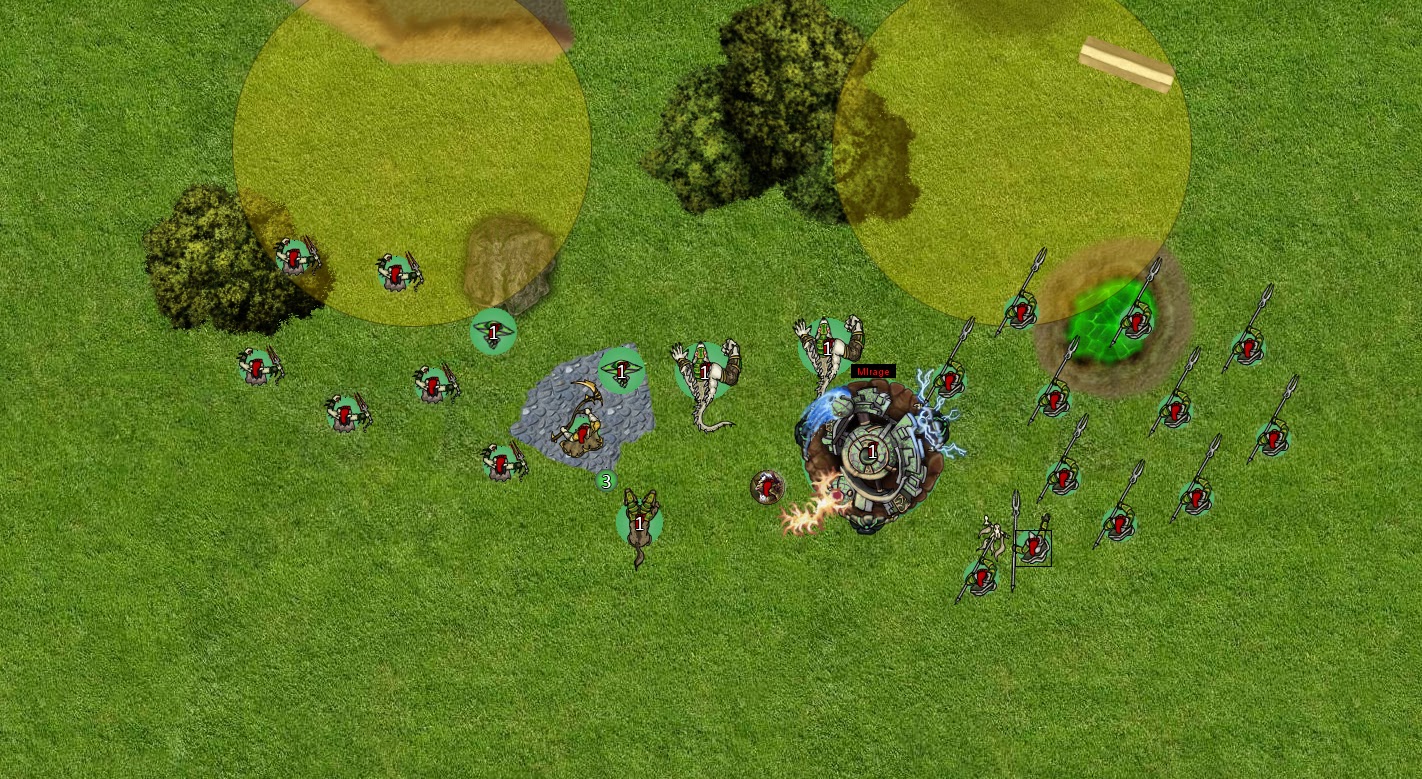

Menoth turn 1:

Everything powers up and advances or runs. The Redeemer scatters into some Wolves, nearly killing the foremost two, but matching Armor on the second one.

The Revenger runs up and Sevy shoots a free Rebuke through it to catch my Wolves.

I apparently forgot to take a screenshot of this turn as well. Derp.


What I could have done better:

I didn't need to get my Wolves within 20 inches of his Revenger on that side. Sure, measuring 20 inches on Vassal is a bit messy, but it can be done and I should have just not done that. The forthcoming Rebuke really messed up the game for me.

I also screwed up my Fulcrum placement hard with the Wolves since it could only Apparate like..an inch forward? If that. I also think I should have committed my Purebloods both to one side since Scenario should have been my win condition here, but I was too caught up in the idea of gunning down a heavy a turn.

What did my opponent do really well:

He deployed an Arc node on either side, making my turn one angles for infantry really difficult without getting Rebuked. 

He also picked the correct side of the table, with excellent defensive terrain.


Circle turn 2:

Rebuke on my Wolves is basically the worst thing that could happen, and without it I could have swarmed him good this turn.

Instead, I move up and nearly kill his middle Reckoner with a combination of Woldwyrd and Pureblood shooting.

I put down some defensive Pillars of Salt and Feat, catching everything but the Redeemer and Revenger.

Bloodweavers run like crazy, engaging stuff and threatening Severius himself if he doesn't clear them out next turn.


Menoth turn 2:

Sevy allocates three focus to the right-hand Reckoner, two to the Redeemer, and stuff starts happening.

Sevy Feats, killing all of the Bloodweavers.

Jacks move around on the left, getting in the zone and preventing me from scoring.

The Right-Hand Reckoner charges my Pureblood and does about half damage. His Redeemer does about half the damage on the Fulcrum with its rockets.


What I could have done better:

I'm not totally sure why I moved that Pureblood up to be honest. I think I went for a cheeky spray into the Reckoner to start the damage train, and that was completely unnecessary.

This turn was actually not that bad. I kept Mohsar in the rubble, fairly safe from most spell assassinations.

I think I probably should have hung back with my Bloodweavers. He might have gone for my Wolves with his Feat then, and my Bloodweavers were much more useful without Rebuke on them.

What my opponent did really well:

He played nice and defensive, giving me one jack to play with but not letting me get at it with anything but a Pureblood and some Wolves of Orboros that couldn't charge.

He also capitalized on his Redeemer having a good target and went after it. There was little I could have done about that and it did make a big difference.


Circle turn 3:

I have delusions about clearing the right hand zone this turn that go something like this: Fulcrum kills the Revenger, Pureblood kills the Reckoner, Mohsar goes over there with Sands of Fate.

Unfortunately, none of these things happen, and instead I commit two Purebloods to the Reckoner, leaving it on about 6 boxes, leave the Revenger on two boxes, and use my Woldwyrds to shoot at his third Reckoner instead of shooting down the really damaged on in the middle of the table.

What I should have done is used both Purebloods to melee down the Reckoner instead of having the second one spray it, used the Woldwyrds to shoot down the Reckoner in the middle with approx. ten boxes on it, and then jammed the Revenger with Wolves after shooting it with the Fulcrum OR just running the Fulcrum away.


Menoth turn 3:

His Redeemer shoots down the Fulcrum with a spectacular damage roll.

His damaged Reckoner in the middle of the table charges my Pureblood in the back and between it and the first Reckoner and Rhoven and Co. kill it pretty dead.

The Covenant sings No KD, and the pillar body blocking my Wyrds get shot off the board, followed by a charging Blessing who kills one of them.


What could I have done better:

Well...I could have finished off his Jacks for one thing. I could have kept my Pureblood out of charge range of Rhoven and Co. 

Thing is, up until this turn, I was feeling pretty good. He had two heavies with 11 boxes between them, a Revenger with 2 boxes left, and a Reckoner way off to the side. If I'd just had better target priority, I could have made it so that he didn't have either of his intact heavies, and also prevented the two Weaponmaster charges into the Pureblood. 

This actually leaves me with a ridiculous assassination threat on the table at that point as both Purebloods can trample up or move and spray once Mohsar goes in to apply Doppler Bark. 

This is really the turn where things fell apart for me, and it was simply because I got distracted and didn't finish the job. Dead heavies don't kill you stuff back, crippled heavies can. 

What my opponent did really well:

He used all of his resources, and I mean all of them. The Reckoner in the middle only had movement and Cortex left before it charged in, and he managed to connect with my Pureblood and bash the snot out of it. 

I had not considered Rhoven and Co. as an offensive piece yet because I felt like Sevy would be too vulnerable without his Shield Guards, but by eliminating my Pureblood there, he didn't really need them anymore. 

Circle turn 4:

Desperation time. Mohsar drops everything. 

Pureblood goes Ghostly and moves around the Reckoner, but stays within 2 because....no reason really, and so becomes rat 3, missing Sevy by 2. 

Wolves move in, kill choir, and Reposition forward. Mohsar maltreats the Pureblood, Sands of Fates to the Wolf, casts Doppler Bark, but cannot seal the deal, not doing any damage with his first three attacks. 

I call it at this point. 


What could I have done better:

Well...I could have maybe tried to play for attrition. 

The Reckoners have about 8 boxes between them thanks to Sunhammer (remember they had like 11 between them before they charged in), so I could used the Pureblood to potentially move around them and spray both of them down from inside the zone, or at least spray the one in the zone and also Rhoven. 

I have four Wolves of Orboros left and the Revenger has two boxes. They could go in on it, and then if they fail, Mohsar could Sands to one of them and the Sands to the Standard Bearer behind the wall to potentially not die from a charging Sevy. 

At that point I go 2-0 with an intact Pureblood who would be out of charge range of all of his models thanks to the forest, and my opponent has to start throwing things away to contest. 

Ah Hindsight. 

I could also have done the same thing, but moved the Pureblood more than two inches away from the Reckoner, meaning my spray from him would have hit. I could have also done that last, after Sevy had had his defense reduced to 5 so it wouldn't matter. 

Post Game Thoughts:

Lots of things I could have changed, lots of ways I could have mitigated dice. 

It's pretty incredible how a series of small misplays can just spiral the game out of control. It's actually one of the mantras I used to recite to myself before tennis games - unforced errors are not how you win games. 

Warmachine is an extremely complicated, tactically dense game, and it's always important to look back at the games you play and check yourself to see how you can do better than you did, whether you won or lost. 

This next report hammers home a different, arguably more important general idea rather than looking specifically at the things I could have done better. Only one of them mattered. 


Battle Report 95: Vindictus (Exemplar Interdiction) vs. Rasheth

Prologue:

Vindictus
- Reckoner
- Reckoner

Knights Exemplar Seneschal x2 (Free!)
Wrack
Gravus

Vengers Max
Vengers Max
Knights Exemplar
Knights Exemplar

Vs.

Rasheth
- Hydra
- Despoiler
- Gladiator

Soulward
Paingiver Master Tormentor x2

Tyrant Commander and Standard
Beast Handlers
Bloodrunners


I unfortunately lost the roll off, meaning that I had to go second. This is a problem for this list since my threat ranges are so massive (15 inch threat on Vengers is amazing) that I really want to take up the table space and not let him have any of it.

There's nothing I could have done about this here, so onto my deployment.


My game plan here is to use the Vengers to set the line of skirmish firmly on his half of the table. He simply doesn't have enough attacks to really clear everything I throw at him, and I am going to feat turn one in order to insure the alpha strike.

After that, and probably after his Feat, I get to charge in with two units of Knights Exemplar (who actually threaten 11 inches in this list) and their Seneschals, not to mention two Reckoners which, thanks to the new Fuel Cache objective, can go in through the forest to finish off the Hydra should it survive.

I think my Deployment here is fine for that game plan. Vengers will get up the table very quickly, limiting where his Bloodrunners can go. A turn 1 feat means that his Master Tormenters will have to walk up to combat with the Vengers, likely not killing any with thresher and then sitting there waiting to die.


Skorne turn 1:

My opponent moves everything up the table as far as it can go, with the exception of the Master Tormenters and the Bloodrunners.

Already I am giving him headaches with the threat ranges on the Vengers, and he spends about 5 minutes on the right hand Tormentor to make sure it cannot be charged this early.

I notice Rasheth shifting to the left, and I think this is going to be a strong Scenario game for me based off of that. He cannot protect all of the zones well enough, and I might actually be able to score three on my second turn.


Menoth turn 1:

I set up my army pretty well here. The Vengers in the left zone will come into the Hydra from where I put them and anything else that ventures into there will simply get slaughtered.

I've put my Reckoner just outside of Hydra walk range, so if he wants to get at it he needs to trample. That being said, the Hydra is in charge range of the Reckoner, so he needs to either move back or (probably) die next turn to charging Cavalry and a charging, Battled heavy.

My critical mistake here? Not checking one crucial distance.

I make sure that Vindictus will be outside of the Hydra's trample range, but I fail to consider the sprays. I also fail to consider the Despoiler, and running 12 inches to apply Dark Shroud.

Let's do some math here.

Hydra gets five sprays, and under Rasheth Feat he needs 7s to hit and is dice -2. He has no other attacks since Vindictus popped his Feat, so no spells, no charges into Vindictus, nothing.

Vindictus is camping 3, and my opponent will (next turn) boost hit and damage on the first two sprays, leaving the last three to chance.

Oddsmachine puts this at a 22% assassination run.

With Dark Shroud, that number goes up to 56%.

This is all well and good, but had I chosen to place Vindictus a quarter inch farther from Despoiler, it would not have mattered (dice went funny).

Other options I have include:

Put my Reckoner farther up to make my opponent need 9s to hit Vindictus.

Build a Reckoner wall in front of Vindictus 4.1 inches (I think this is probably a bad idea since my opponent can reasonably trample up to and cripple one of them with the Hydra and possibly charge the other with Despoiler).

Cast Defenders Ward on Vindictus instead of True Path and camp 4 (Ultimately wouldn't have mattered with my opponents dice, but it takes the assassination run down to a 3.29% assassination WITH Dark Shroud and a 0.17% chance without it. Actually even with my opponents dice, that would have made enough of a difference to prevent the first two boosted sprays from killing Vindictus)

What I should have done instead of all of those options is prevented my opponent from rolling any dice by keeping Vindictus three quarters of an inch farther away from the Hydra and not letting him even have the chance.

This is the biggest lesson, I believe, of risk mitigation in Warmachine. The less dice you allow your opponent to roll, the better your game will be. Vindictus did NOT need to be that extra smidgen of movement closer to my opponent's Hydra. Take that off the table and my opponent has no good options.

He can't get to my Vengers on the left with anything but Hydra Sprays, and he's going to kill the two he is in range of, trigger Battle Driven, trigger Righteous Vengeance on the Seneschal next to him, and then he will take three boosted PS 14 lances, 2 PS 11 Weaponmaster attacks, one a charge, a few PS 9 Weaponmaster charges, and a Reckoner charging him with Battle up.

Even under Rasheth's Feat, I think that Hydra is dead.

On the right side, his prospects are even worse, as to get the Vengers under Rasheth's feat, Rasheth has to be incredibly exposed. I probably lose one horse at worst, and then sweep that flank.

I am in a very good position here EXCEPT....

I've left Vindictus in a place where my opponent gets to roll dice against him.

Now, it still takes a good player to realize that all of this is an option - I sure didn't see it until it was happening. Many people would have just let me sit there and set up to take the Alpha - props to my opponent for taking the opening.


Skorne turn 2:

The Despoiler Runs, Rasheth Feats, and my opponent rolls very well, killing Vindictus in two sprays.


Post-Game Thoughts:

I had all the information, I had all of the tools, I just got lazy and didn't consider the Hydra Sprays a legitimate threat. I got lazy, I got complacent.

I got too caught up in how freaking incredible my turn 2 was going to be, and didn't consider how vulnerable I had left myself. I could have done many things differently to make the dice math worse for my opponent, but again, I could have just not let him roll dice at things that mattered.

This is one of those games that you don't ever forget, and they usually jump start you to play better the next time you set your models up. In the game I played today with Harbinger for example (see battle report 93), I tripled checked the threats he could get onto Harbinger every. Single. Turn.


Conclusion:

Every loss is an opportunity for growth. One of my favorite movies as a kid was "Chittie Chittie Bang Bang", and my favorite song from that film is called "From the Ashes".

The line in particular is "From the Ashes of disaster grow the Roses of Success".

It's a rousing little tune, and it's really fun to watch a bunch of old guys bluster about. That being said, they have a point - learn from your mistakes, be honest with yourself, and don't begrudge your opponents their wins.

The object of the game is to win, the point of the game is to have fun. Actually the object of the game is to win, the point of the game is for both players to have fun, and that's something that I, personally, need to work on.

Monday, May 1, 2017

Circle List Building for SR 2017

Prologue:

SR 2017 represents a huge shift in the way Warmachine and Hordes will be played. Attrition is going to be the most important aspect of an army, shortly followed by Assassination.

Scenario is going to be a relatively minor consideration from now on, as you have to score max points on nearly every Scenario for two turns without losing more than one or two points in order to win quickly. Games are designed to last until turn 7, with a "mercy" rule allowing opponents who are seriously cleaning house to win earlier if they get ahead by six control points.

Also, certain Scenario elements are uncontrollable by various models. Circular Zones can only be controlled by Warrior models, Rectangular Zones only count for Warbeasts/Warjacks, and the Warcaster/Warlock models can control both, as well as flags, while still not contesting.

One of the things that I really miss about the middle years of mark II was the feeling of the game - yes, there were strong things, but instead of complaining about them the idea was to figure out how to beat them. In that spirit, I present my thoughts on how to play and win with Circle in SR 2017.


Advantages:


There are a couple more changes to the SR packet that greatly benefit Circle players.

The first of these - immobile models can control again - makes our Gallows Groves, Shifting Stones, and Sentry Stones viable scoring threats for low point values.

The second of these - that units no longer have to be at 50% or greater strength to control - means that we actually get a great deal of flexibility out of our units when we do clear zones.

A lone Shifting Stone can score on a Circular Zone if it is the last one in the unit. That's a big deal, since late game they tend to not do a whole lot, and when the game ends on turn limit, the person with the most points wins.

Overall advantages:

Mobility: 

Most of our (non - warbeast) models have Pathfinder, which is going to be handier than ever with the new terrain rules.

(For those of you who haven't seen them, central terrain is now required, and there are recommended amounts of LOS blocking terrain etc).

This means we will have an easier time engaging certain armies by having better threat ranges (Menoth, Melee Cygnar, some Mercs) through rough terrain.

We will also have an easier time contesting with our terrain indifferent models.

Jank Angles:

If the premeasurement restrictions in the packet stay, and your TO/Meta actually enforces them, Circle can perhaps get back to our roots of really odd threat ranges in completely non-linear ways.

Shifting Stones combined with Hellmouth or Telekinesis sounds like a good place to start.

Ambushing Wolves or Orboros are great in the Wild Hunt theme, and I'm actually starting to look at Bradigus and Kromac 1 again, since a 5" and 3" threat extension are both really excellent.

We also have Loki, and this might be the most important thing Circle has gotten for SR 2017. This guy is an absolute monster for Attrition fights, as he can regularly pull in an enemy heavy, smack it a few times, and then have a Stalker charge in, kill it, and Sprint out. If you combine him with a unit of Shifting Stones, Telekinesis, or Hellmouth, Kaya 2's Feat, Kaya 1's Spirit Door, Warpath, Grayle's Feat, Baldur 1's Feat (or Wild Growth to block LOS to him), Admonition, etc. he can do this turn after turn after turn.

Alternatively, you can soften his target up for him with Circle's wyrdly strong gun options and have him finish the job by himself.

Expect to see Loki a lot more in SR 2017.

Control Feats:

We have access to a couple of really excellent time-walk type feats in Circle. Kaya 2 lets you go in and really mess your opponent up multiple times in a row.

Baldur 1 can let you get 2-3 rounds of shooting off before the ranks close, as can Wurmwood.

Morvahna 2 might see some play again, as the ability to cycle through your army twice in one game is pretty good where attrition is concerned.

If the meta shifts to nothing but massive battlegroups, Mohsar's Pillars of Salt can control those kinds of armies fairly easily. (I know they're not a feat, but you get the idea).

Tankiness?

Baldur 2, I'm looking at you right now. Woldwrath plus Fulcrum plus Woldwyrds is likely to be one of Circle's staple lists in the coming months as the Fulcrum CID becomes canon. It's a really nasty gunline that also happens to be pretty good in close combat thanks to Woldwrath Auto Knockdown fists, Steady Wyrds, and Gunfighter everywhere.

Meta Shift:

The theme forces coming down the pipe really encourage units to hit the table, and literally everything in Circle doubles as an infantry blender. Our heavies have great anti infantry tech, our units are all fantastic at killing dudes, most of our spell casters have good infantry killing spells.

If the meta shifts to more units, especially because units are better able to contest for long periods of time than heavies are, I can see Circle really getting potent. Anyone wanna see my 4 point Bloodweaver Night Witch with maybe Affliction or Curse of Shadows take out an entire Shield Wall unit? I know I do.


Disadvantages:


We die Horatio, we die:

Circle models cannot take a hit. Outside of a couple select models (Woldwrath, new Fulcrum, Megalith, etc.), our Beasts tend to be ARM 17 with 27-30 boxes. That's not holding up to boosted POW 12s nevermind punches from Heavy Jacks.

High Defense is great, but there are lots of Knockdown effects, DEF lowering spells, Stationary effects, and accurate guns/models out there. I've lost two Warpwolves in a round to a unit of Brigands before.

We die easily.

This is a problem because the game no longer ends very fast, and our models tend to not attrition well. I expect to see Circle really struggle to adapt for the first few months of SR 2017 as our stable of current powerhouses get taken down a peg.

Our most powerful option (currently), Wurmwood cannot hold an attrition fight for more than 4-5 rounds. Much of his attrition value comes from forcing opponents to come to him in a mad rush in order not to lose on Scenario.

Lists based on Warpwolves in general are going to have a rough time. I think Ferals are going to hardly see the table in favor of Stalkers with their built in "get away" trick and Purebloods with the ability to spray from a distance. Loki I think will be in most Circle lists because he does the best Attrition tricks against heavies that Circle has. Ghetorix might also see some play with Kaya 2 (pathfinder), Krueger 2 (highest base damage output), and the Kromacs.

Casters that I think can mitigate this problem:

Kaya 2 (double alpha = good for attrition)
Kromac 2 (His beasts tend to live through the retaliation)
Baldur 1/2 (Control Feat and ARM skew)
Morvahna 2 (Kill everything twice)
Tanith (Admonition and Affliction)

Casters that I think might be able to based on meta choices:

Krueger 2 (Control feat is great, Rebuke on a unit can keep it out of the game, assassination potential is high)
Krueger 1 (Good into some gunlines, kills infantry no problem)
Mohsar (Controls battlegroups very well, high Assassination potential between Sands of Fate and Doppler Bark plus guns)
Wurmwood (Good board control for a few rounds, might be enough)
Kromac 1 (Very high threat ranges)
Kaya 3 (Good DEF buff on her Feat, kills the world with Synergy)
Kaya 1 (Spirit Door might just be amazing)
Una 2 (trading 9 point Griffons for heavies is okay still)
Grayle (Good threat range extender, Stealth from feat is nice)

Casters that I think will not see much play:

Bradigus (I hope I am wrong about this. I'm painting mine up this week to see if he is viable)
Morvahna 1 (She is basically garbage folks)


Our Infantry is Bad:

Circle gets by playing with about 3 units right now. Reeves, Sentry Stones, and Wolves of Orboros in the Wild Hunt. We also occasionally see Bloodtrackers with Baldur 1.

These models are all good at killing other infantry, and can also put a dent in heavies. They're faster than average dudes (speed six is nice) and they all have pathfinder.

Most of the rest of our options hardly see play.

Here are a few that I think will get some attention with the SR 2017 changes.


Druids - these guys plus Krueger 2 = lots of assassination potential. Telekinesis plus Pulse of the Earth or whatever it's called means that if an enemy parks a heavy within about 5 inches of their caster, you have an easy KD on their caster, followed up by shots from Wyrds/Loki/Fulcrum/whatever.

Their ability to push enemy heavies out of zones might also allow Circle to play a Scenario game unlike most other factions AND simultaneously keep our heavies safe by moving enemy models out of striking distance. I suspect this unit will see more play in the coming months.


Tharn Ravagers - if (and this is a BIG if) the meta shifts to crazy infantry spam, these guys will be kings. The unit can single handedly chew through multiple other units, and they're fast reach models that see through forests.


Here are my picks for models that will see more play than they currently do, but will still be niche:


Mist Riders - the Fulcrum making them Magic 7 is a HUGE deal. The bump between MAT/RAT/Magic 6 and 7 is an extremely significant change in their likelihood of hitting. Between that and a potential shift to infantry heavy lists, these guys could see some play.


Warpborn Skinwalkers - Man I wish they still had two attacks. That being said, these guys are ARM 18 against melee attacks with 8 boxes, and with a few casters (Kromac 1 and Baldur 1 specifically), they go to ARM 20. This means that a charge from a pow 12 infantryman is going to do about 3 damage, and a charge from a pow 12 weaponmaster is going to do 6 ish. What does that mean? Well it means that it takes more than one guy to finish off one Skinwalker, and for attrition purposes, that can be big.

They also have Hyper-Regen, so if they don't get killed in one turn, they're probably not dying the next, and with Relentless Charge, they will not mind the prevalence of terrain that will become the new norm.

Death Wolves (in the Tharn Theme) - with a corpse token, these guys are actually fairly likely to get across the table, and when they do, the enemy units will melt.


Units that I doubt will see play still?

Woldstalkers - Take Reeves.

Blood Pack - Take Woldstalkers. Then when you are still lacking, take Reeves. This unit is seriously awful.


We struggle to kill 8-10 ARM 20 heavies:

Khador is going to likely be our worst matchup in SR 2017. We do not have the firepower to take them on headfirst, we do not outthreat them in melee with about half of their casters (Karchev with Road to War, Harkevich with Mobility and a Kodiak Kloud Wall, etc), and their jacks are mostly Mat 7, so our higher DEF value does very little.

This is a big part of the reason why I think Loki is going to be such a big deal in SR 2017. Contesting with random dudes and pulling in a heavy a turn to kill it with Loki plus guns or Loki plus a Stalker seems to me to be one of the few ways we can hope to win that attrition fight, and even THAT doesn't work if they bring the right Clamjacks.

This is one of the biggest reasons I am considering Mohsar as a serious contender for SR 2017 - Sunhammer chips away at their boxes every turn (Seven turns times 8 jacks times approximately 2 damage per jack is 112 damage, with a range of 56 to 168 depending on your dice - not insignificant), and his feat makes their caster very vulnerable without any focus camp if they want to fuel the heavies.

I personally do not have an answer to this question yet outside of praying for assassinations, but I think this is going to be a constant issue for a while.


Sample Lists:

Here are a couple of lists that I am personally thinking will be good starting points for SR 2017:

Krueger 2
- Loki
- Megalith
- Woldwyrd x2

Fulcrum
Blackclad Stoneshaper
Gobber Chef
Druids of Orboros
- CA
Shifting Stone x2

The list has awesome assassination potential, decent control, and can kill a heavy a turn consistently with Fulcrum shooting, Wyrds, and Loki hooks. Loki and the Fulcrum both have incredible threat ranges in this list thanks to Telekinesis, and can also be kept fairly safe with Druid pushes and KDs and Telekinesis on either enemy models or themselves.

The Druid CA and Gobber Chef are five points that I really haven't a clue what to do with, and the Stoneshaper might not be necessary either, for 8 points of....something else. Options include Gallows Grove and Hutchuk, Blackclad Wayfarers, Night Witches, or a Sentry Stone unit.


Kaya 2
- Laris
- Ghetorix
- Loki
- Warpwolf Stalker
- Pureblood
- Gorax

Gallows Grove
Swamp Gobber Chef
Shifting Stones
Sentry Stones x2

This is my basic beast brick, and I actually like it just fine with Kromac 1 as well. With Kaya, I've seen a couple of builds I really like in the Wild Hunt where the Wolves of Orboros tie things up between the Alpha Strikes.

I think the Gobber Chef is a pretty important piece here, as he allows you to go bananas with your fury on feat turn and then have a bunch of Mannikins for beasts to eat the next turn.


Baldur 2 Bones of Orboros
- Woldwrath
- Megalith

Fulcrum x2
Stoneshaper x3 (free)
Sentry Stone x2

High powered gunline with an absurd amount of Tankiness? Yes please. I really think this list can be terribly potent, and I am even considering dropping the Sentry Stones for two units of Shifting Stones and a Blackclad simply to teleport and heal the Fulcrums.


I am sure there are many other builds out there, but this is my first iteration of several lists that seem potent and interesting.

Conclusion:

I believe Circle is in for a rough couple of months here. We have some pretty cool tools, but a lot of our potency is going to stem directly from what other people decide to play, and that is not the most fun place to be.

That being said, we also have some really cool stuff to experiment with, and I think the last six months of 2017 are going to see some of the most interesting and innovative Circle lists to date surface.

Please feel free to throw your own thoughts on board here, this is just one players opinion and is almost certainly going to be proven wrong ^.^

Thanks for reading!


Tuesday, January 31, 2017

Target Priority; Why You Don't Need to Kill Everything to WIn


Prologue:

Target Prioritization is one of the hardest things to understand in Warmachine, and is one of the two remaining pinnacles of the three axioms I used to play by in Mark 2.

The reason target prioritization gives players so much difficulty is very simple - it changes based on every list, every scenario, and every board set up.

In some matchups, the one thing on your opponents side that gives his shooting model Eyeless Sight has to be a priority. In others, you need to focus down his colossal as quickly as possible. In a third, maybe the only thing that matters is killing your opponents' arc node.

It drastically differs depending on the tools available to you, the tools available to your opponent, and the table you are playing on.

Furthermore, there are going to be different parts of the board that you will need to target more strongly than others in every game. These might be places where

Rather than trying to generalize what is an extremely specific topic, I'm going to walk through several deployment and first turn pictures and go through my thought process in regards to what is important and what is not important given the matchup and the table.

Feel free to disagree with me; these are just opinions, and you might have a different take.


Table 1:


Me


Opponent


This is an interesting matchup because the lists are straight up identical, and so, theoretically, target priority should be identical. 

This is only partially true. 

Have a look at my opponent's deployment - he's skewed middle/right with only one Sentry Stone unit on the left side, and we are playing Incursion. 

Instantly, that unit becomes my priority. The first person to clear a flag and hold it in this Scenario is often the winner, and if all he contests with on that half of the table is one, moderately hardy unit, I will happily commit a heavy warbeast to kill it and then camp that flag with a solo. 

As long as I can apply pressure in the middle and right sides of the table (which I've deployed to do), I should force him into bad trades as he sends models to that side of the table in order to not lose on Scenario.

Here's what happened:


Sentry Stone goes into the left flag to contest


I kill off the left hand Sentry Stone and threaten Wrong Eye with my heavies if he decides to commit


Everything on the left half of the table dies and I build a massive wall of things to prevent my opponent from getting to Lanyssa, who is happily camping that flag.


Table 2:


Opponent


Me

Man this was a game. My opponent's list has basically three models in it - Raiders, Shamans, and Soulwards,

It's hard to target prioritize when your opponent spams - this is one of the inherent strengths of spamming.

Here, my opponent has four ways to ignore stealth, and so those things need to die as fast as possible.

Alternatively, I know my opponent isn't likely to come very far forward since that's how gunlines play, and since my list can run 14 inches, I can get into his shooting models very quickly.

Here, the priority is not a model, it is the Scenario. I don't need to kill anything unless it comes into the zone, I just need to jam it and engage it and annoy it until I score 5. To that effect, the objective is the first target, and anything else that comes into the zone becomes target number two.

If I try and get into a flat out attrition war with this list, I will probably lose it, so identifying my win condition very early is important.

Here's what happened:


The Cloud wall of doesn't matter against Shamans goes up.


He shoots a bunch of my stuff, but I run and engage as many things as possible.


I clear the zone and score three points, he still has a lot of models left.


He commits three models to the zone and I'm able to kill them all and dominate again. He still has plenty of dudes left over there though.


Table 3:


Opponent


Me

This is a very interesting table to look at. I'm playing Grayle, and have very few ways to crack armor reliably.

He's playing Reznik 1 and three heavy jacks, and right away I'm worried about killing them.

However, my opponent skewed his heavies very, very far right on Linebreaker with a forest separating half the map, which means that I really just need to clear his infantry on the left side of the table and run a Solo to hold down the left flag. If he abandons the right hand flag, I can take it over pretty easily since my list is capable of putting down one heavy no problem.

As a result, the most important target for me is the Flamebringers since they're the only targets mobile enough to contest turn after turn, and they are also the hardest to pin down (notice how my Reeves are on that side of the table).

Here's how that game progressed in a few snap shots.


Opponent commits his jacks right and I line up my Reeves to kill off his Flamebringers.


I take out the TFG and the majority of the Flamebringers. My Wolves of Orboros also roll like crazy and kill his Castigator (which I was not expecting to happen). 


I get a solo onto the far left flag and destroy the objective, and can now basically just run away from his armor the rest of the game. 

If I had tried to engage his army on his terms, I most certainly would have lost this game. Instead, I was able to prioritize the correct models and parts of the table to care about, and effectively played the game while ignoring his entire battlegroup.

Table 4:

Me

Him

This is an interesting game because I'm not really interested in killing his army here. All I really care about is blocking off his access to the friendly flag, and I know I'll win on Scenario eventually. I have lots and lots of models to contest with, and I can be very defensive with my beasts, as their job is basically to sit in the back of the zone and kill any enemy beasts that come into the zone looking to contest my flags.

I think it might even be possible to score on his turn 2 while preventing him from scoring with the threat of an assassination.

As such, I'm happy trading one for one in beasts, as that will eventually lead to a scenario win.


Check out how I've set up my models here - I have a wall of threats between the empty gap in the zone and my flag, and I also have a veritable flood of models to contest with on the right that I can send in one at a time. My opponent doesn't have a good way to get to my flag to contest, and as such I can sit back and wait for him to come to me, expending no resources in the process.

The game progresses and he's had to throw his army at me to not lose on Scenario, leaving both his caster exposed, and the vast majority of my resources intact.


I have plenty of attacks with which to kill everything left on the table, and at the end of this turn I score to 5 and kill Saeryn without even activating the Stalker or Wolf Riders.


Conclusion:

There are too many things to say on this subject, it literally changes between every game.

The overarching points I would like to emphasize are as follows:

1) Figure out what your win condition is at deployment - this will tell you which models to prioritize, which to keep safe, and which to ignore.

2) Pay attention to the terrain and your opponents' deployment. There are games where you will literally not have to deal with 1/3 to 1/2 of your opponents' models just by playing with the terrain well.

3) There are parts of the table that should be prioritized just like there are models that should be prioritized, and these will change from game to game as well. Not threatening or defending these parts of the table can lose you the game just as quickly as not destroying the right models will.

Thanks for reading!

Friday, October 7, 2016

Scenario 8: Recon


We're here! If you've read the other seven, I salute your diligence. If you haven't, check them out!

I absolutely love this Scenario. It's a central zone with a live Scenario that uses every piece of Scenario tech in the book outside of killbox. I've had some of the most dynamic games I've ever played on this Scenario, and it's never dull.

This is one of the few Scenarios that I think can actually still be a good game without relevant terrain.

Be warned, this is extremely live. Control Warcasters/locks can sometimes trivially get three points with no retaliation on their second turn, especially the ever present Haley 2 and Wurmwood.

Going First or Second?

It's a good idea to go first on Recon if:
- You have a really fast army that can get far enough up the table to prevent your opponent from getting into the zone.
- Your opponent is playing a very small footprint army. Going first gives you a lot of flexibility to go for one of the flags with your Warcaster/Warlock for a surprise dominate.

It's a good idea to go second on Recon if:
- There are very relevant pieces of central terrain that you want to exploit.
- You have a list with a hard control feat or spell list that will allow you to clear the zone turn 2, kill your opponents objective, and get 2-3 points on your second turn.
- You need to counter-deploy to your opponent.


Game Plan for Going First:

Depending on what you're playing against, you need to flood that zone with stuff on your second turn. If you're playing against a control list under Haley 2, Wurmwood, or even something like Rask or the Witch Coven, you need to be aggressive turn 1 and 2.

Turn 1, run. If there's LOS blocking terrain on one side of the table, consider getting your Warlock/Warcaster behind it, preferably within walking distance of the flag. This will give you a lot of options after turn 2. If you can cut off half the table and then take the flag while preventing your opponent from contesting, you will probably win this game.

I have won games with literally my warlock and two-three infantry models left to my opponents entire army just by shoving models down his throat and dominating a flag for several turns in a row.

Remember, you always have the option to get three points in one turn by blowing up the objective and dominating the zone, so if your opponent starts committing their army hard to contest your flag after you score two, look at potentially just running your Warcaster/Warlock into the zone and destroying the objective for a surprise win from no where.

Turn 2, you need to flood that zone if you're playing against a list that wants to alpha and then feat to prevent you from attacking back. You should contest regardless as well as you can since even a non-control caster can get 3 points and be safe from retaliation if you don't put pressure on them.

Have models behind your contesting models for a counter punch. If your opponent commits to clearing that zone with his important models, you need a way to kill them or hurt them enough that he won't be able to dislodge you easily.

Watch out for the second player to get 3 points on his turn 2 and then....just run to the flag and laugh as you scramble to catch up to him. If you can, contest the flag that the enemies Warcaster/Warlock is near to prevent this from happening.

This is a live Scenario.

Game Plan for Going Second:

If you haven't figured it out by now, I love playing control lists, and Recon is one of the most interesting puzzle boxes to unlock for Scenario games. The potential for wins from nowhere is tantalizing, and one of the best ways to beat me in particular in this Scenario is to give me a difficult (but still possible) opening for a blistering 3 point turn 2. I will almost always go for this, even if it means my warcaster is exposed, I can't help it!

With that in mind, here's how I like to play this Scenario if I go second. I'll also include a slightly safer play afterwards.

Turn 1, you should be moving up as far as you can without getting either shot off the table or charged. You NEED to be able to get attacks into every part of the zone next turn in order to 1 - kill the objective and 2 - kill everything else in the zone.

Pick a side that your Warcaster/Warlock is able to be pretty safe while still within walking distance of the zone. I like to have the Fuel Cache objective in my control lists to make a cloud for my Warlock or Warcaster to hide behind.

Ideally there's a wall or forest to hide behind on turn 1.

Turn 2, time to go! This is really only a good idea if you're playing a list that can prevent you from getting alpha'd in return, since a canny opponent will have a solid, devastating counterpunch for you otherwise. There are some cases when this is fine even knowing that. If, for example, they haven't put hardly any models on one side of the table and you can run your warcaster over to the flag and dominate it for a couple turns safely, this is still worth it.

Kill. Every. Thing.

And dominate the zone for 2, netting you 3 points after the objective is dead. Also, feat with Haley 2 or Wurmwood if you're playing them.

Next turn, if you're not playing Wurmwood or Haley 2, they've probably contested pretty heavily, and if you can clear all of it, great! Do so and win. If not, run to a flag and get another point.

If you are playing Wurmwood or Haley 2, they won't likely have a ton of stuff in the zone. Kill it and win.


The Safe Way:

Set up a favorable piece trade on turn 2, and then attrition down one side of the table until they don't have much left. Find the flag with your warlock/warcaster, dominate it, and eventually blow up the objective while contesting the zone and their flag.

You set the pace, so use that to your advantage! Learn to love Recon as I love it, it's one of the great Scenarios.


Thursday, October 6, 2016

Scenario 7: Outlast


Outlast is one of my favorite Scenarios. The rules for it are easy to understand, no killbox means no "gotcha" moments for newer players, and it scales really well in terms of complexity as terrain and opponent armies get added into the mix.

I would say that going first is slightly worse in general on this Scenario. The possibility of scoring 2-3 points and the importance of terrain makes it much more likely for me to take second on this one with many casters and lists.

The exceptions to this rule are the really fast, pathfinder heavy armies such as Legion, Circle, some Cygnar builds, etc. that can mitigate the terrain and like to dictate the placement of their opponents' armies. They will likely want to go first.

Game Plan for Going First:

Your job is to make venturing into those zones an unpleasant thought for your opponent, and to make it really, really hard for them to score in both.

Take advantage of any terrain inside the zones themselves to keep your models safe from a turn 2 murder spree. Sometimes just parking a heavy behind a wall is enough to ensure your opponent isn't able to clear that zone for a few turns.

Turn 1 you need to respond to how your opponent deployed. Some boards will lend themselves incredibly well to a second player skew on deployment, with 90% of their army obviously gunning for one zone.

You have a couple of options:

Send some hard to take out models like Daughters or Bloodrunners (both have Stealth, high speed, and high defense) to that side of the table and just play the contest game. They're going to have to start contesting the other zone sooner rather than later, and you can start killing their models with ease.

Counterswing your army so that you have an all out brawl in one zone, with a few smaller level engagements in the other. I only recommend this approach if your army outthreats their army by a significant margin or if you can use terrain to blunt their attack lanes.

If they deploy centrally, note where their heavies and Warcaster/Warlock are. That will broadcast to you which direction they are likely to swing. You need to make it difficult for their Warlock/Warcaster to be in that zone safely if at all possible. The threat of 2-3 high POW boostable guns is often enough for a Warcaster to skirt their range, and it may give Warlocks pause as well.

Turn 2, if you can already get some charges off with chaff models, go for it. Set the line of engagement right on their half of the table and prepare for a counterpunch. Baiting out a high value heavy with one of your own of lesser value also has some merit. The edges of the zones will be the important places in this Scenario, with the center devolving into a kill zone. Whoever can hold their pieces back for longer typically wins this fight.


Game Plan for Going Second:

You're planning on playing for Scenario if you chose to go second, and that probably means there are a couple of awesome terrain pieces that will prevent your opponent from significantly contesting one of the zones. A good example of this:

See the big forest on his side of the left zone? That's awesome for me, since I can reliably expect all of his contesting models to either be extremely slow coming through the forest, coming through the middle of the table where I can kill them off, or around the far side of the forest, which is a position that will leave them without support.

Turn 1, get your pieces in position for a turn 2 clearing of a zone and a control or dominate of at least one. This means that you need to think about where your opponent is likely to put his models the next turn. If he's got a forest to hide behind, you need to get your models to a point where they can walk or trample through the forest to shoot/hit his models.

If there's a big piece of rough terrain, expect your opponent to go around the edges of it and prepare accordingly with models in place to murder whatever comes that way.

Turn 2, hopefully what you expected to happen on your opponents' second turn has happened and you're in position to capitalize on his placement and score some points. You need to be prepared for an assassination run from your opponent if you start winning on Scenario, as this is usually their only option. Do your very best to deny them that angle.

Clear zone, get point, rinse and repeat. This is obviously highly list and terrain dependent, but it's a general game plan that has served me well in the past.

Wednesday, October 5, 2016

Scenario 6: Incursion


Incursion is an oft-maligned, much disliked Scenario. It's gotten progressively less so over the last few years, although a vocal minority still long for the days of disappearing flags.

The reason for this is that while many other Scenarios encourage bunching up to contest/control central elements of the table, Incursion can be won simply by running a solo around a forest between the middle and one outside flag and then capping that flag for 3 turns straight while your opponent struggles to disengage something significant to contest with.


General Game Plan for Going First:

You are slightly disadvantaged going first in this Scenario. It is on you to make sure your opponent doesn't get a free Scenario win, but preventing that from happening is a lot easier in Incursion than it is in other Scenarios (list and terrain dependent as always).

 Getting up the board is a big deal, as you can dictate where your opponents' models can and cannot go. At the same time, if there are massively important terrain features on the table (like a forest between the middle flag and one of the outer ones or a forest blocking one side of the table from seeing the central flag), you could be in pretty big trouble.

Your entire goal is, as usual, to prevent your opponent from scoring too many points on their second turn without massive sacrifices on their part. This is an extremely live Scenario, and Haley 2, Wurmwood, etc. with massive control feats are going to be very nasty to fight here.

Turn 1 - spread out as much as you can and move up the table. You need to prevent your opponent from getting more than 1 point on their second turn if at all possible, and as a result, you need to be fairly spread out. The nice thing about Incursion, is that you can actually contest all three flags while staying pretty central, like so:


While you are spread out a lot more than you would be in other Scenarios, it's not too bad.

Turn 2, note where your opponent has dedicated their resources turn 1. If you can force them to over commit in order to take one flag, this is the time to do it. A good example of this is a cheap solo, unit or warjack with exceptional defense or armor (Khador is awesome at this with their cheap heavy jacks and the Man O' War Drakhun) that will take a serious amount of resources to shift. You can have a counterpunch waiting behind against most lists to take out what they commit and be solidly up on the piece trade.

It is very important to keep your opponent from scoring 2 points on their turn, as it is then possible for them to win the game in one turn. The only time I would be okay with this is if they have to commit their entire army (like a colossal, a heavy, and their unit) to do so and I am able to completely table them on my following turn, and even that can be scary.


General Game Plan for Going Second:

You are looking for ways to get points without getting slaughtered on the counter attack. This is a great Scenario for a gunline with some expendable models to go control flags with after shooting all contesting models off of it.

You should have chosen an advantageous side terrain wise. Most tables will have a flag that is at least a little bit harder for your opponent to get to than the others, and you can use this to your advantage.


Turn 1, you need to get up the table. Be wary of your opponents ranged attacks, if any, but you need to get your models to a comfortable place from which to walk or charge things that are on the flags on your next turn.

Remember, they can be 28 inches from your board edge and still be contesting, which means that you have to cover 18 inches of space in 2 turns if you want to use melee attacks to clear those flags off.

If you're playing Haley 2 or Wurmwood, look for ways to commit heavily on at least two flags and then feat to ensure that you get a second alpha or a massive Scenario lead.

Turn 2, assess your opponents counterpunch options and then try and score on flags that won't get you killed on the next turn. In Mark iii, this is much easier than it would have been in mark ii since most lists are running fairly battlegroup heavy, meaning there isn't as much infantry to clear from flags or to counterpunch with. If you can start a piece trade off strong by killing a heavy or two with a nice back-up of your own, you'll be in great shape.

Remember, the onus is on them to prevent you from scoring a bunch on turn two, use that to your advantage and you can probably start the attrition game off strong even if you don't get a significant Scenario lead early.


Monday, October 3, 2016

Scenario 5: Extraction


Extraction is, in many ways, the bigger brother to take and hold. Similar placement of the flags, still has a killbox, but has two objectives into the mix as well.

It's a completely different animal. This can be a terrifically live Scenario, as any one of them that allow you to get three points in one turn have explosive potential, and the different pieces being so close together makes it fairly easy to concentrate a lot of fire power on any one of them.

This also leads to a lot of back and forth slugging it out after the initial class, and that makes an interesting game as well. This is one of those scenarios without a real gimmick to it, and choosing which side to commit most of your resources to after the lines have clashed will be your key to victory here. Going second doesn't necessarily lend you a great advantage either, since the ways to score are spread out quite a bit and require significant investment to take advantage of.

One thing I should note is that there are some armies that are fast enough and have enough bodies to go first and just run past the flags, setting the line of engagement very far into the opponents half of the table, which will prevent the second player from being able to contest or score for many turns. Lists like a Circle Advanced Deploy spam, Trollbloods with Fennblades, and other such lists can do this.

Going First or Second:

You should go first on Extraction if:
- You have a really fast, melee based list.
- Your opponent is playing a slower, grindy list without much in the list dedicated to unjamming models. A good example of this is a Karchev list with 6-8 heavies.

You should go second on Extraction if:
- Your opponent isn't playing a super fast swarm list.
- You have a control caster who can easily get 2 points on turn 2.
- You need to counter deploy to your opponent.
- Terrain heavily favors one side of the board.


Game Plan for Going First:

If you're going first, you need to prepare your army to do one thing - prevent your opponent from scoring more than one point on their second turn. There are a couple of ways to do this.

Your deployment should be pretty central (terrain dependent as usual), and you should spend turn one getting up the table as usual. If you have some self-sufficient units or solos like Daughters of the Flame or Man O' War Drakhuns, I like putting them towards the edges of the board in this Scenario so that they can charge in from the side in the coming turns.

Turn one, if your opponent has skewed their deployment, this is an excellent time to do what I call the first turn cross. Essentially, you move enough stuff (40% of your models say) to their skewed side to keep contesting for a few turns on the flag and then devote the remaining 60 ish percent of your army to coming around the opposite side of your objective. Your immediate goal is securing the flag, and your secondary goal is to feed your opponent enough stuff to keep him on his flag without giving him your whole army.

Turn two, make sure to spread your models that will contest his flag out so that if he wants to kill all of them, he has to commit multiple models. I've seen a lot of people confused by this idea, so consider this helpful little vassal diagram.

Obviously I'm speaking directly to clearing off models by using melee attacks, but playing against ranged armies is similar. By spacing things out, he will either have to commit really far forward to clear the back models contesting, or he will not clear off the flag with range attacks only.


This is what I would call contesting poorly. Sure, you've put six models next to that flag, but he can completely take them out with minimal investment of resources compared to say:


This. This is contesting awesomely. I don't even know how your opponent would get a RNG 2 model with multiple attacks where the right hand Typhon is, but with this spread of models, it will take a LOT more of an investment to clear the flag than the one above it.

A third option, and one that I would highly recommend adding to the second diagram, is having a counter-punch ready to hit back when your opponent comes in to clear your models. Obviously the placement of the models contesting in this example is poor, but notice how the green player has drawn his opponents' model into his charge range:


Those wouldn't necessarily be Mannikins, they could be weaponmaster infantry or another heavy or anything else with a serious bite.

Contesting and general flag play is a difficult area of play to nail down, but once you've figured it out, you'll start trading your resources a lot more efficiently than your opponent will. There will likely be an entire article dedicated to contesting, controlling, and counterpunch with regards to both flags and zones coming up after I finish the Scenario series.

Turn 3, you have a good opportunity to counter-punch on one or both flags. Ideally, you've been able to prevent your opponent from scoring more than one point, and on turn 3 you will counter by clearing both flags and controlling for two points. The game will continue to play like this until someone either messes up and gets assassinated, or someone wins on Scenario.

A quick note - DO NOT FORGET ABOUT THE OBJECTIVES. I have seen - and experienced - many games on Extraction where one player is up by one point, usually 3-2 or 4-3, and the other player dedicates all of his models to clearing one flag and killing the objective to win. Your objective is one of the most vulnerable parts of this Scenario after turn 2. Take advantage of your opponents and try to keep your opponents' models contained by the flags so they cannot take advantage of yours.


Game Plan for Going Second:

The game plan for second is remarkably similar to going first, except your goal is to score as many points as possible without giving away your army.

Models like Widowmaker Marksmen and other high Range, high accuracy models will be your best friend here as they can clear infantry off flags with ease.

Your general game plan should be to get to a flag, clear it and control it turn 2, and then look for ways to clear it and destroy your opponents' objective on turn 3. While you're doing this, you need to contest the other flag as efficiently as possible, or even control it if the opportunity arises.

Turn 1 run, choose the side they've devoted less models to as your focal point.

Turn 2, check and see if they've got any models currently controlling flags. If so, either kill those models and contest, or just contest on one flag and devote more resources to the other flag.

If they haven't put models in place to control the flags, and your threat ranges are higher, it can actually be totally okay to dance on the edge of their charge ranges with your models and wait a turn. If they commit hard to controlling a flag on their third turn, you can crush a big piece of their army and get a control point at the same time.

Make sure they won't score any points at the end of the turn, and if possible, take one flag decisively and prepare to go after their objective the next turn.


Conclusion:

This is one of the most balanced Scenarios in the packet, and as such it's hard to talk about in general terms. Most of the time, it's going to come down to who can contest and manage the flags best, as well as who has a plan for going after the objective. Even though this is a killbox Scenario, their warcaster/warlock can stay quite far back from the front lines and still influence the game. I would say that this Scenario doesn't lend itself particularly well to assassination for that reason, but if they ever commit their warcaster/warlock, look for ways to end the game.