
I haven't lost back-to-back games since the ATC in early March, and before that, I don't think I have lost back-to-back games in six months or so.
That all changed this last week with a pair of games, and instead of writing up typical battle reports, I thought I would take my usual process of chewing apart every single turn for more optimal plays and share it with you.
When I say taking apart every single turn, I literally mean every single turn. I still remember (and occasionally run through) a loss in the finals of a Steamroller last August (I think?) where Sorscha spiked some dice to take down Wurmwood.
On the drive home (it's 2.5 hours each way to Spokane), I came up with no less than six separate, superior plays for that situation, literally working the turn to death in my head.
I have also noticed that, as of late, I've started to get lazy with my placement again, and since the whole purpose of writing this blog was to help me analyze and improve my game play, I think it is high time that I address that with a seriously hard critique of my games.
Battle Report 94: Mohsar vs. Severius 2 (Creator's Wrath)
Prologue:
Because of my limited pool of local opponents, I occasionally am able to use the internet and Vassal to play games with buddies of mine from across the country.
On this occasion, I had paired up Mohsar with Wurmwood to try out against a Severius 2 and Amon pairing.
Upon realizing that Amon basically had no chance into Mohsar, we decided that Severius 2 into Mohsar would be the best game and off we went.
Mohsar
- Pureblood
- Pureblood
- Woldwyrd
- Woldwyrd
- Argus
Fulcrum
Bloodweavers
Wolves of Orboros
- CA
Gobber Chef
vs.
Severius 2
- Heirophant
- Reckoner x3
- Redeemer
- Revenger
- Blessing of Vengeance
Vassal x2
Covenant of Menoth
Wrack
Choir (max)
Rhoven and Co
I won the roll off and went first, unfortunately I forgot to take deployment screenshots of my stuff, but I got my opponent's just fine. We were playing Outlast.

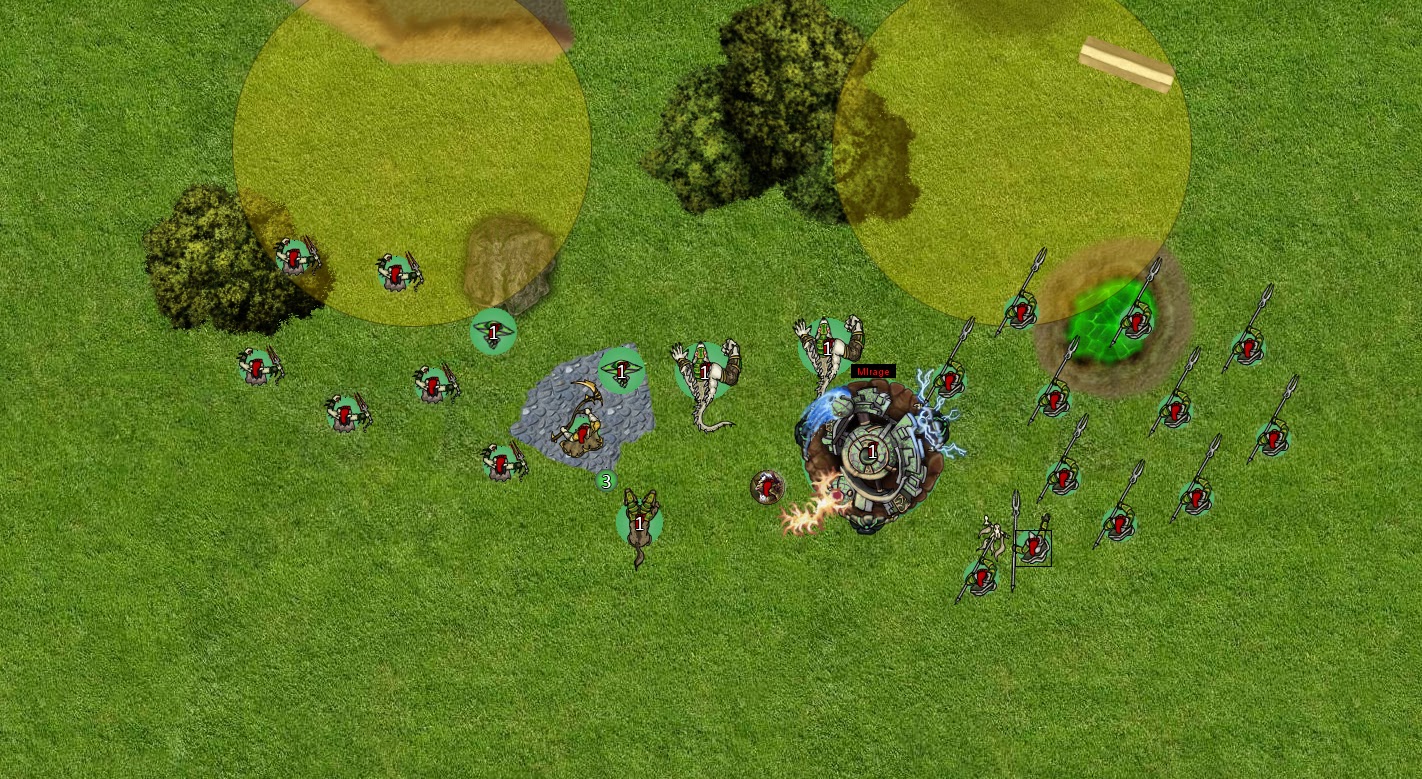
I deployed pretty centrally with the Fulcrum skewed right. I didn't want to get it wedged between the obstruction in the left zone and the forest.
Circle turn 1:
Everything runs, Wolves on the right, Weavers on the left. I know the infantry is basically going to be useless this game so I don't think about where I am placing it too hard.
Mohsar puts Mirage on the Fulcrum and Sunhammer on himself.
Menoth turn 1:
Everything powers up and advances or runs. The Redeemer scatters into some Wolves, nearly killing the foremost two, but matching Armor on the second one.
The Revenger runs up and Sevy shoots a free Rebuke through it to catch my Wolves.
I apparently forgot to take a screenshot of this turn as well. Derp.
What I could have done better:
I didn't need to get my Wolves within 20 inches of his Revenger on that side. Sure, measuring 20 inches on Vassal is a bit messy, but it can be done and I should have just not done that. The forthcoming Rebuke really messed up the game for me.
I also screwed up my Fulcrum placement hard with the Wolves since it could only Apparate like..an inch forward? If that. I also think I should have committed my Purebloods both to one side since Scenario should have been my win condition here, but I was too caught up in the idea of gunning down a heavy a turn.
What did my opponent do really well:
He deployed an Arc node on either side, making my turn one angles for infantry really difficult without getting Rebuked.
He also picked the correct side of the table, with excellent defensive terrain.
Circle turn 2:
Rebuke on my Wolves is basically the worst thing that could happen, and without it I could have swarmed him good this turn.
Instead, I move up and nearly kill his middle Reckoner with a combination of Woldwyrd and Pureblood shooting.
I put down some defensive Pillars of Salt and Feat, catching everything but the Redeemer and Revenger.
Bloodweavers run like crazy, engaging stuff and threatening Severius himself if he doesn't clear them out next turn.

Menoth turn 2:
Sevy allocates three focus to the right-hand Reckoner, two to the Redeemer, and stuff starts happening.
Sevy Feats, killing all of the Bloodweavers.
Jacks move around on the left, getting in the zone and preventing me from scoring.
The Right-Hand Reckoner charges my Pureblood and does about half damage. His Redeemer does about half the damage on the Fulcrum with its rockets.

What I could have done better:
I'm not totally sure why I moved that Pureblood up to be honest. I think I went for a cheeky spray into the Reckoner to start the damage train, and that was completely unnecessary.
This turn was actually not that bad. I kept Mohsar in the rubble, fairly safe from most spell assassinations.
I think I probably should have hung back with my Bloodweavers. He might have gone for my Wolves with his Feat then, and my Bloodweavers were much more useful without Rebuke on them.
What my opponent did really well:
He played nice and defensive, giving me one jack to play with but not letting me get at it with anything but a Pureblood and some Wolves of Orboros that couldn't charge.
He also capitalized on his Redeemer having a good target and went after it. There was little I could have done about that and it did make a big difference.
Circle turn 3:
I have delusions about clearing the right hand zone this turn that go something like this: Fulcrum kills the Revenger, Pureblood kills the Reckoner, Mohsar goes over there with Sands of Fate.
Unfortunately, none of these things happen, and instead I commit two Purebloods to the Reckoner, leaving it on about 6 boxes, leave the Revenger on two boxes, and use my Woldwyrds to shoot at his third Reckoner instead of shooting down the really damaged on in the middle of the table.
What I should have done is used both Purebloods to melee down the Reckoner instead of having the second one spray it, used the Woldwyrds to shoot down the Reckoner in the middle with approx. ten boxes on it, and then jammed the Revenger with Wolves after shooting it with the Fulcrum OR just running the Fulcrum away.

Menoth turn 3:
His Redeemer shoots down the Fulcrum with a spectacular damage roll.
His damaged Reckoner in the middle of the table charges my Pureblood in the back and between it and the first Reckoner and Rhoven and Co. kill it pretty dead.
The Covenant sings No KD, and the pillar body blocking my Wyrds get shot off the board, followed by a charging Blessing who kills one of them.

What could I have done better:
Well...I could have finished off his Jacks for one thing. I could have kept my Pureblood out of charge range of Rhoven and Co.
Thing is, up until this turn, I was feeling pretty good. He had two heavies with 11 boxes between them, a Revenger with 2 boxes left, and a Reckoner way off to the side. If I'd just had better target priority, I could have made it so that he didn't have either of his intact heavies, and also prevented the two Weaponmaster charges into the Pureblood.
This actually leaves me with a ridiculous assassination threat on the table at that point as both Purebloods can trample up or move and spray once Mohsar goes in to apply Doppler Bark.
This is really the turn where things fell apart for me, and it was simply because I got distracted and didn't finish the job. Dead heavies don't kill you stuff back, crippled heavies can.
What my opponent did really well:
He used all of his resources, and I mean all of them. The Reckoner in the middle only had movement and Cortex left before it charged in, and he managed to connect with my Pureblood and bash the snot out of it.
I had not considered Rhoven and Co. as an offensive piece yet because I felt like Sevy would be too vulnerable without his Shield Guards, but by eliminating my Pureblood there, he didn't really need them anymore.
Circle turn 4:
Desperation time. Mohsar drops everything.
Pureblood goes Ghostly and moves around the Reckoner, but stays within 2 because....no reason really, and so becomes rat 3, missing Sevy by 2.
Wolves move in, kill choir, and Reposition forward. Mohsar maltreats the Pureblood, Sands of Fates to the Wolf, casts Doppler Bark, but cannot seal the deal, not doing any damage with his first three attacks.
I call it at this point.

What could I have done better:
Well...I could have maybe tried to play for attrition.
The Reckoners have about 8 boxes between them thanks to Sunhammer (remember they had like 11 between them before they charged in), so I could used the Pureblood to potentially move around them and spray both of them down from inside the zone, or at least spray the one in the zone and also Rhoven.
I have four Wolves of Orboros left and the Revenger has two boxes. They could go in on it, and then if they fail, Mohsar could Sands to one of them and the Sands to the Standard Bearer behind the wall to potentially not die from a charging Sevy.
At that point I go 2-0 with an intact Pureblood who would be out of charge range of all of his models thanks to the forest, and my opponent has to start throwing things away to contest.
Ah Hindsight.
I could also have done the same thing, but moved the Pureblood more than two inches away from the Reckoner, meaning my spray from him would have hit. I could have also done that last, after Sevy had had his defense reduced to 5 so it wouldn't matter.
Post Game Thoughts:
Lots of things I could have changed, lots of ways I could have mitigated dice.
It's pretty incredible how a series of small misplays can just spiral the game out of control. It's actually one of the mantras I used to recite to myself before tennis games - unforced errors are not how you win games.
Warmachine is an extremely complicated, tactically dense game, and it's always important to look back at the games you play and check yourself to see how you can do better than you did, whether you won or lost.
This next report hammers home a different, arguably more important general idea rather than looking specifically at the things I could have done better. Only one of them mattered.
Prologue:
Vindictus
- Reckoner
- Reckoner
Knights Exemplar Seneschal x2 (Free!)
Wrack
Gravus
Vengers Max
Vengers Max
Knights Exemplar
Knights Exemplar
Vs.
Rasheth
- Hydra
- Despoiler
- Gladiator
Soulward
Paingiver Master Tormentor x2
Tyrant Commander and Standard
Beast Handlers
Bloodrunners
I unfortunately lost the roll off, meaning that I had to go second. This is a problem for this list since my threat ranges are so massive (15 inch threat on Vengers is amazing) that I really want to take up the table space and not let him have any of it.
There's nothing I could have done about this here, so onto my deployment.

My game plan here is to use the Vengers to set the line of skirmish firmly on his half of the table. He simply doesn't have enough attacks to really clear everything I throw at him, and I am going to feat turn one in order to insure the alpha strike.
After that, and probably after his Feat, I get to charge in with two units of Knights Exemplar (who actually threaten 11 inches in this list) and their Seneschals, not to mention two Reckoners which, thanks to the new Fuel Cache objective, can go in through the forest to finish off the Hydra should it survive.
I think my Deployment here is fine for that game plan. Vengers will get up the table very quickly, limiting where his Bloodrunners can go. A turn 1 feat means that his Master Tormenters will have to walk up to combat with the Vengers, likely not killing any with thresher and then sitting there waiting to die.

Skorne turn 1:
My opponent moves everything up the table as far as it can go, with the exception of the Master Tormenters and the Bloodrunners.
Already I am giving him headaches with the threat ranges on the Vengers, and he spends about 5 minutes on the right hand Tormentor to make sure it cannot be charged this early.
I notice Rasheth shifting to the left, and I think this is going to be a strong Scenario game for me based off of that. He cannot protect all of the zones well enough, and I might actually be able to score three on my second turn.

Menoth turn 1:
I set up my army pretty well here. The Vengers in the left zone will come into the Hydra from where I put them and anything else that ventures into there will simply get slaughtered.
I've put my Reckoner just outside of Hydra walk range, so if he wants to get at it he needs to trample. That being said, the Hydra is in charge range of the Reckoner, so he needs to either move back or (probably) die next turn to charging Cavalry and a charging, Battled heavy.
My critical mistake here? Not checking one crucial distance.
I make sure that Vindictus will be outside of the Hydra's trample range, but I fail to consider the sprays. I also fail to consider the Despoiler, and running 12 inches to apply Dark Shroud.
Let's do some math here.
Hydra gets five sprays, and under Rasheth Feat he needs 7s to hit and is dice -2. He has no other attacks since Vindictus popped his Feat, so no spells, no charges into Vindictus, nothing.
Vindictus is camping 3, and my opponent will (next turn) boost hit and damage on the first two sprays, leaving the last three to chance.
Oddsmachine puts this at a 22% assassination run.
With Dark Shroud, that number goes up to 56%.
This is all well and good, but had I chosen to place Vindictus a quarter inch farther from Despoiler, it would not have mattered (dice went funny).
Other options I have include:
Put my Reckoner farther up to make my opponent need 9s to hit Vindictus.
Build a Reckoner wall in front of Vindictus 4.1 inches (I think this is probably a bad idea since my opponent can reasonably trample up to and cripple one of them with the Hydra and possibly charge the other with Despoiler).
Cast Defenders Ward on Vindictus instead of True Path and camp 4 (Ultimately wouldn't have mattered with my opponents dice, but it takes the assassination run down to a 3.29% assassination WITH Dark Shroud and a 0.17% chance without it. Actually even with my opponents dice, that would have made enough of a difference to prevent the first two boosted sprays from killing Vindictus)
What I should have done instead of all of those options is prevented my opponent from rolling any dice by keeping Vindictus three quarters of an inch farther away from the Hydra and not letting him even have the chance.
This is the biggest lesson, I believe, of risk mitigation in Warmachine. The less dice you allow your opponent to roll, the better your game will be. Vindictus did NOT need to be that extra smidgen of movement closer to my opponent's Hydra. Take that off the table and my opponent has no good options.
He can't get to my Vengers on the left with anything but Hydra Sprays, and he's going to kill the two he is in range of, trigger Battle Driven, trigger Righteous Vengeance on the Seneschal next to him, and then he will take three boosted PS 14 lances, 2 PS 11 Weaponmaster attacks, one a charge, a few PS 9 Weaponmaster charges, and a Reckoner charging him with Battle up.
Even under Rasheth's Feat, I think that Hydra is dead.
On the right side, his prospects are even worse, as to get the Vengers under Rasheth's feat, Rasheth has to be incredibly exposed. I probably lose one horse at worst, and then sweep that flank.
I am in a very good position here EXCEPT....
I've left Vindictus in a place where my opponent gets to roll dice against him.
Now, it still takes a good player to realize that all of this is an option - I sure didn't see it until it was happening. Many people would have just let me sit there and set up to take the Alpha - props to my opponent for taking the opening.

Skorne turn 2:
The Despoiler Runs, Rasheth Feats, and my opponent rolls very well, killing Vindictus in two sprays.

Post-Game Thoughts:
I had all the information, I had all of the tools, I just got lazy and didn't consider the Hydra Sprays a legitimate threat. I got lazy, I got complacent.
I got too caught up in how freaking incredible my turn 2 was going to be, and didn't consider how vulnerable I had left myself. I could have done many things differently to make the dice math worse for my opponent, but again, I could have just not let him roll dice at things that mattered.
This is one of those games that you don't ever forget, and they usually jump start you to play better the next time you set your models up. In the game I played today with Harbinger for example (see battle report 93), I tripled checked the threats he could get onto Harbinger every. Single. Turn.
Conclusion:
Every loss is an opportunity for growth. One of my favorite movies as a kid was "Chittie Chittie Bang Bang", and my favorite song from that film is called "From the Ashes".
The line in particular is "From the Ashes of disaster grow the Roses of Success".
It's a rousing little tune, and it's really fun to watch a bunch of old guys bluster about. That being said, they have a point - learn from your mistakes, be honest with yourself, and don't begrudge your opponents their wins.
The object of the game is to win, the point of the game is to have fun. Actually the object of the game is to win, the point of the game is for both players to have fun, and that's something that I, personally, need to work on.
No comments:
Post a Comment